It is not an easy job to manage a website. Add to it that it is built on Drupal. Listing and managing the modules can become quite difficult. In order to manage the modules in your Drupal website and quickly find them when in need, Module Filter can help sort out and filter the right module.
What is the Module Filter?
A module filter organizes modules according to various categories such as recently enabled, newly available, core etc. It makes it easier for the admin to browse through all the available modules. A very simple module, it doesn't require any special configuration.
To make this module work install and enable it.
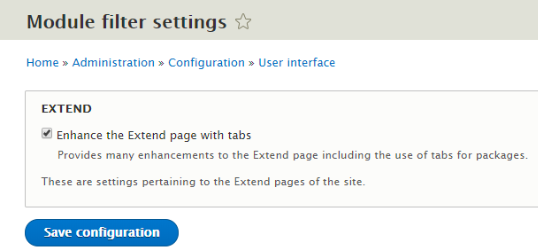
- Navigate to Home > Administration > Configuration > User Interface

Select the checkbox to enable a new “extend” window.
- Select extend and save configurations.
Benefits of Module Filter
So, by now we have seen that module filter is a tool for the admin to make his/her life easier when dealing with a large number of modules. It makes for easy maintenance of modules such that the admin doesn't need to be scrolling through a huge list of an unsorted list when searching for a particular module.
- Ultimate categorization
If one knows what is the category of a particular module falls in such as Administrator, performance, etc., then, it is very easy to find that particular module as everything is categorised.
- Easy to find module
It is convenient to find recently installed and enabled modules with the help of the recently enabled tab. Even if we forget the name of the module, it would always be listed in it.
- Better search
We can agree that the module filter search is far better than the one provided by Drupal because of the added filter options makes it easier to search for desired modules.
- Easily accessible tabs
Even though there are tabs present in vanilla Drupal, but these tabs serve no real purpose as they are no easily accessible. This is not the case with module filter as all of the tabs are readily accessible in the form of a side -bar.
How Does It Work?
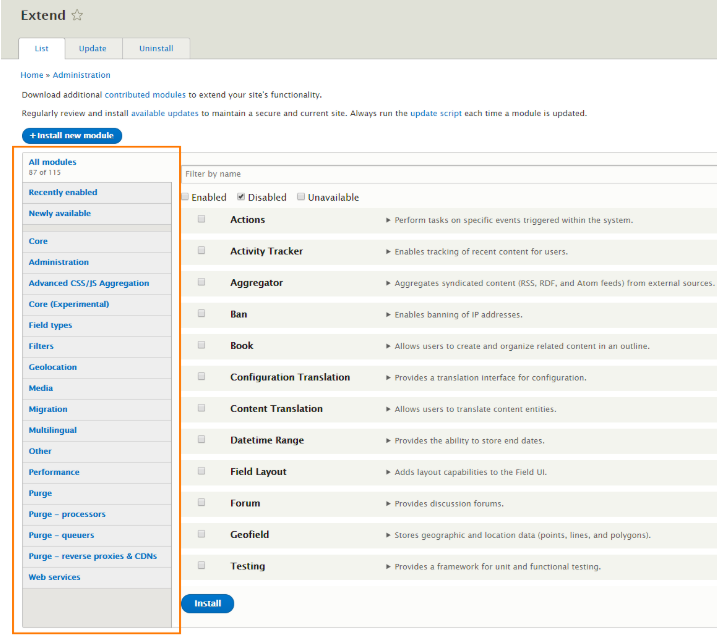
Let’s see what a module list without the module filter looks like.
It helps to make a list of all the available modules mixed together where the tabs serve no purpose because they are not easily accessible and our only way to search for the required modules is by using the search bar at the very top of the list.
The Search Bar:
The search bar is exactly similar to the search bar that comes pre-loaded in Drupal but, this feature when bundled with the other elements (which will be discussed below), becomes a very powerful tool.

The Checkboxes
Enabled:
If this option is enabled, then it would reveal all the enabled modules in the current tab. For example, if we select All Modules and select enabled, then it would display all the modules installed and enabled in the site.
Disabled:
Similarly, if we select a tab and check this option, then it would display all the installed and disabled modules in the site.
Unavailable:
This would display all the modules installed (enabled or disabled) which are currently not available for one reason or another. The most common reason being version incompatibility.

Okay, so after we now know how the above three options work, let’s have a look at some of the tabs that are available.
The Tabs
All Modules: As the name implies, this tab would display all the modules installed.
Recently Enabled: One of my favorite tabs because it helps us to figure out what was our most recently enabled module.
Newly Available: This tab would display all the modules that are newly available.
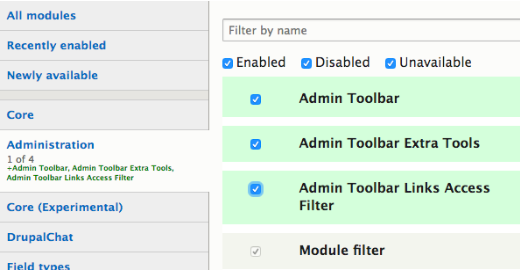
Counter: On each tab, we get counters displayed which indicates how many of the module in the category is enabled already. Moreover, when we disable/enable modules, the counter also indicates the number of modules being affected.

As for the other tabs, the core tab would list all the pre-loaded modules that come bundled with Drupal, the admin tab would contain modules which are required to administer the site such as admin toolbar, module filter and so on.

This is an efficient and organized module which helps in managing the modules. Let me know in the comments below how you found the article.
Subscribe
Related Blogs
Drupal's Role as an MCP Server: A Practical Guide for Developers

"The MCP provides a universal open standard that allows AI models to access real-world data sources securely without custom…
What’s New in Drupal CMS 2.0: A Complete Overview

"Drupal CMS 2.0 marks a significant change in the construction of Drupal websites, integrating visual site building, AI…
Drupal AI Ecosystem Part 6: ECA Module & Its Integration with AI

Modern Drupal sites demand automation, consistency, and predictable workflows. With Drupal’s ECA module, these capabilities…


