How to Create a Drupal Webform to Collect User’s Feedback
Forms are responsible for collecting user feedback, contact information, and other related information of a user, and therefore an important piece of functionality. For an admin, a webform can turn out to the best solution than creating custom forms.
Drupal 8 has a great alternative for building forms, through Webform. An admin or even an editor can easily add and edit a webform in a Drupal website. Drupal 8 core also provides a contact module which allows us to set up a sitewide and user-specific contact form.
While the Contact Module in Drupal 8 provides limited functionalities, Webform modules allow you to create your own form with any possible number of information you are seeking.
Getting Started With Drupal Webforms
Following are some of the ways with which you can install Webform module on your Drupal website:
Using Drush
- Download the file (extracted from the administrative block) and paste it into the Drupal/module folder.
- Download and enable the Webform module with the following three commands and then download all the required libraries:
- drush dl webform
- drush en webform webform_ui
- Drush webform-libraries-download
- An alternate method is to download the libraries and after extracting the libraries. Then paste them into the modules folder. Download the module from Drupal.org.
- After installing the libraries go to the Extend section and search for the Webform module if the module is not clickable then download contribute module files from the given below.
Creating The Feedback Form
We will start by making a simple web form that takes feedback from the user. This form can be easily made with the help of contact form but we don’t get many functionalities and in order, to get those functionalities we have to edit the form. But here we start our form from scratch, we can add entities according to our requirements.
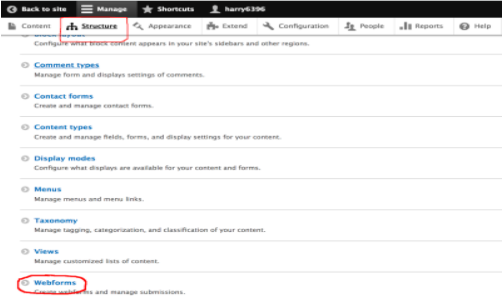
Step1: Go to structure and search for the web form (we have already installed and enabled webform above).
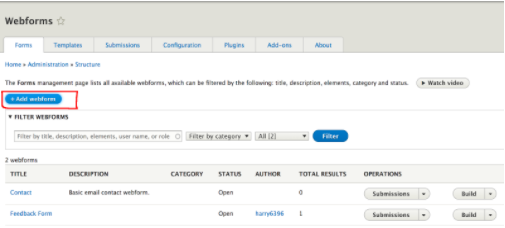
Step 2: Click on ‘Add webform’ button and fill the required details.
Your details may include title, description, category, and whatever information you want to seek from your user.
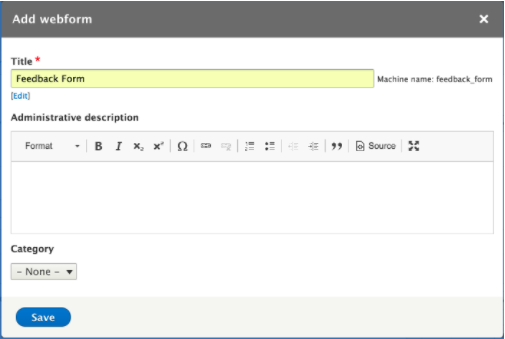
Step 3: After filling all the required information press the 'save' button.
Step 4: Now you need to add various fields to the web form. For this click on the 'add field' button and search for the fields that you want to add.
(Note: If you want to make sure the users enter their name, phone number, email, etc correctly then use the ‘Name’,’Phone Number’,’Email’ elements. These elements add an additional confirmation to the field. Choose your fields wisely in order to make your form effective.
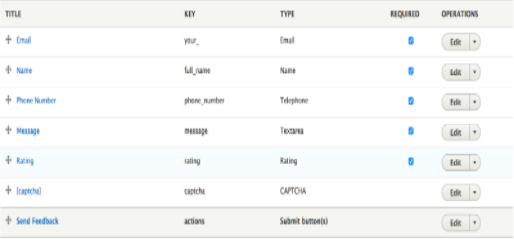
(Note: If you want to add ‘Captcha’ in your feedback form then you need to install the captcha module and enable it before using it in the form.
Step 5: Click on the view tab to see the form. I would suggest you open the form in another tab. If you open the view tab in admin mode then you won’t get to see Captcha working.
(To keep the matter simple we are using the default values of the fields. To make full use of different fields we can set the values according to our uses.)
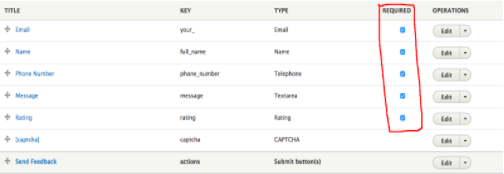
There are certain things that we need to changes before proceeding further. Following are the things:
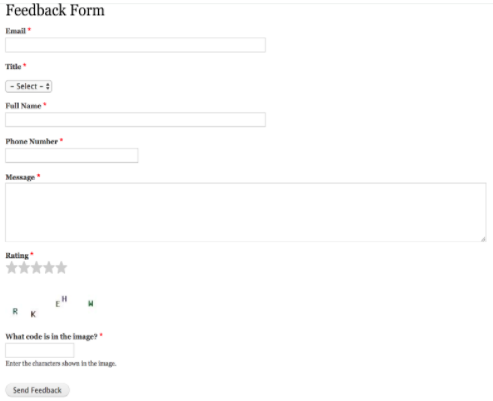
Mark the required fields in order to make the field mandatory. When applying the required field, your form will look something like the screenshot below
After you have applied the fields, your form will look something like the screenshot below
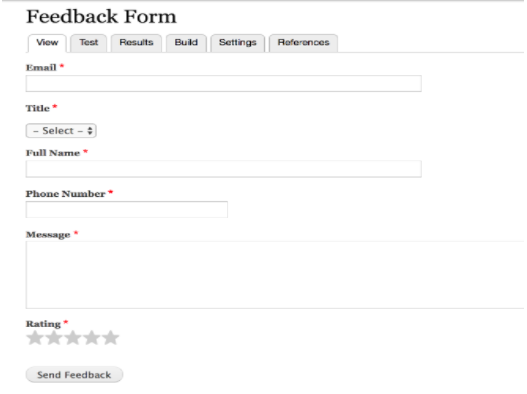
The fields selected in the previous step are marked mandatory with a red asterick.
Testing the Form:
Step 1: To test the form click on the 'test' button.
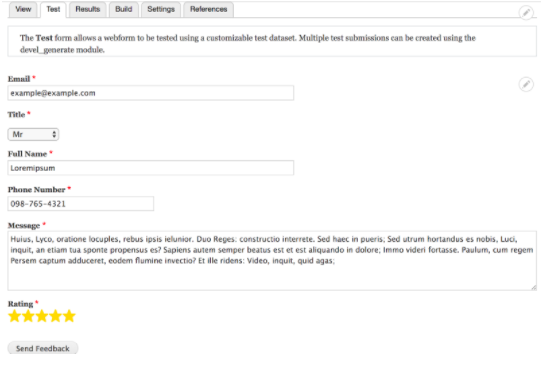
Step 2: After clicking on the send feedback button you can see the data in the 'result' section. Your data will look something like the image below:

Step 3: The Download sub-tab allows you to export the submissions in a variety of ways and it is possible to filter the data based on data or submission ID so that an individual doesn’t need to download all the data in one go.

Summing Up
In this article, we learned to create a webform and its related entities. If we talk about a web page coded in HTML, JavaScript, CSS it takes a lot of time and coding but here with the help of Drupal module we skipped that part and made this form without breaking a sweat.
Let us know in the comments below how you found this article.

Join Our Newsletter
Love open-source tech? Stay updated with projects that make a difference.