Originally, introduced by Google, to keep individuals from utilizing black-hat SEO systems of spamming links across the internet, today there is a diverse opinion on the importance of nofollow links and whether they ought to be used as a major aspect of the SEO strategy.
What Is The 'Nofollow Tag'?
When a search engine crawls your page, it crawls every link present there. In case, you’re using an external link, the search engine crawler will visit and crawl that link too. This will result in the crawler getting deep into the web through various links. Once the crawler is lost from the original link, you tend to lose the benefits of page ranking.
One of the important ways to avoid this is through adding 'nofollow tag' to all the external links which will make the search engine crawlers drop any selected external link and continue crawling within your own website’s page. Here is an example showing how to use the tag:
<a href = “www.wikipedia.org”> Wikipedia </a>
If a search engine crawler visits this link in your content, it’ll be redirected to wikipedia.com which might not be your idea. In that case, you can modify the tag as:
<a href = “www.wikipedia.org” rel=”nofollow”> Wikipedia </a>
Just by adding the tag, you’re telling the search engine crawler not to follow this link and saved your SERP.
It’s a very good practice in SEO to add a no-follow tag if, you’re using any external links in your content.
Nofollow in Drupal
In Drupal 7, there’s no option to add nofollow tag to any hyperlink but, Drupal 8 is full of possibilities.
Drupal's Nofollow list module allows you to list and categorize the links under 'nofollow' and 'do-follow'. Once you categorize any external link as 'blacklisted' any link from that web address will be a no-follow tag. Easy, isn’t it?
Installation & Usage
You can download the module using the following link → Nofollow List and install it as you install any other module in Drupal.
After installing the module, you need to go through some basic configuration.
Step 1: Configure your text editor, in which you want to allow this filter, by visiting the following link - [D8-site]/admin/config/content/formats
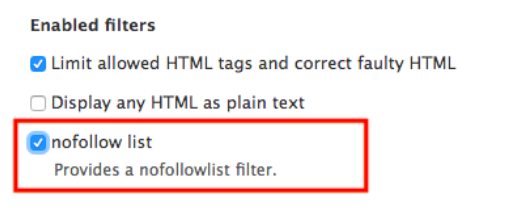
Step 2: Scroll down to the 'Enable' filters section and select nofollow list to enable this filter in your text editor as shown below:
Step 3: Scroll down further to the Filter settings section and now you’ll have the settings for nofollow list. This will have a text area named as Nofollow list hosts as shown below:
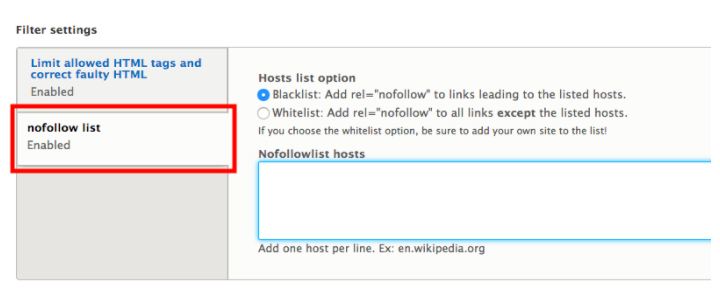
As you can see, there are two options in Hosts list option:
Blacklist: Once you have selected this option and add a link in the text area named as Nofollow list hosts, then the rel=“nofollow” tag will be added to these links which means the search engine crawler will never follow these links.
Whitelist: Once you have selected this option and add a link in the text area named as Nofollowlist hosts, then the rel=”nofollow” will be added to every other link except the mentioned links in the text area. This means the search engine crawler will follow only these links and will drop every other link.
Note: You can select only one option at a time and the module will filter according to the selected option.
|
The most important use of nofollow tag is to tell the search engines about the links which shouldn’t be crawled. This <rel=“nofollow”> is an HTML tag that needs to be conjoined in the hyperlink and the webmaster will have the control to tell the search engine crawlers about which links to be crawled and which not to be. |
Step 4: Click on ‘Save Configuration’ which will save all your configurations. Now, switch to the text editor having the same text format in which you’ve configured the nofollow list settings and start editing your content. Wherever you’ll add the hyperlinks which you’ve added to the nofollow lists hosts will automatically behave depending on the option you’ve selected.
Example
Below is an example to show you how to use the module to make your content editing easier and SEO friendly.
- Blacklist
Starting with the Blacklist option, we will add links to this section. Here, edit the nofollow list settings for Basic HTML text format.
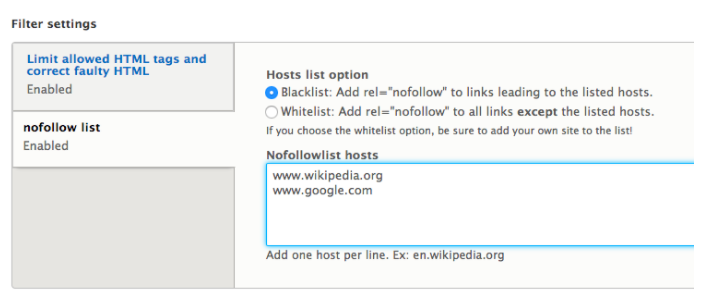
In the hosts, add two links and opt for Blacklist. After saving the configuration, move to your text editor with Basic HTML text format and start adding content which will include some links as shown below:
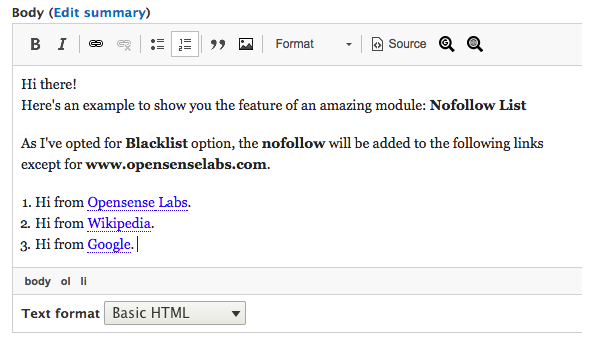
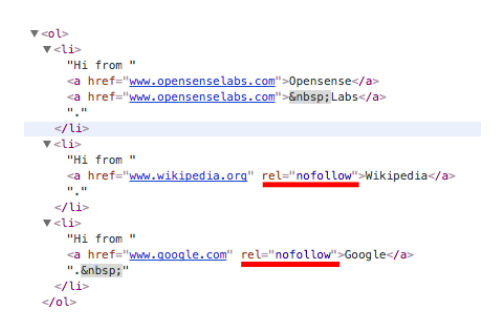
Save content which will generate a node page with the above content. In the image below, you can see in the source code that the Nofollow List module has automatically added rel=”nofollow” only to the mentioned links in the nofollow list hosts:
- Whitelist
The user will now choose only one link that s/he wants to be crawled.
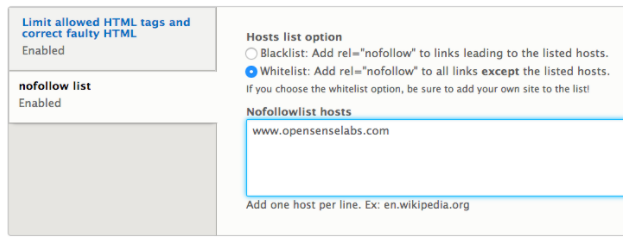
After saving the configuration, move back to the text editor having Basic HTML format as there are changes made in the configuration of Basic HTML text format.
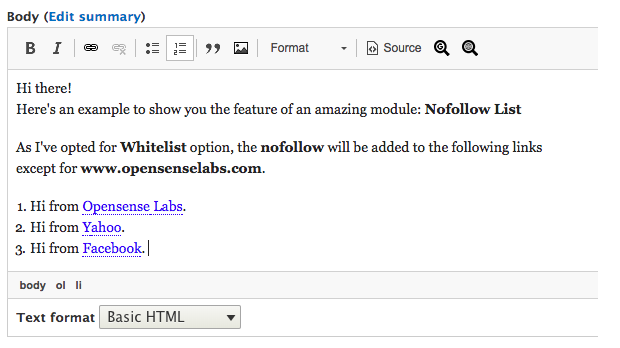
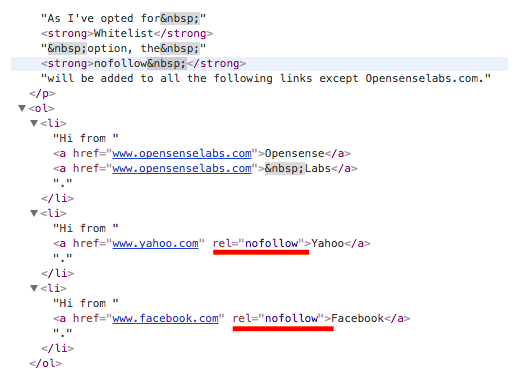
Save the content and move to the corresponding node page to see the magic done by Nofollow List module.
And here it goes:
It’s time to use this module on your Drupal website and boost up your SEO by controlling the crawling of search engines by telling them which link to crawl and which not to.
You can download the module using the following link Nofollow List.
Opensense Labs is the official supporting partner in the development of this module. You can also add an issue on the module issue page Issues for Nofollow List.
Liked the module? Or found any issues? Comment below and let us know. We would be happy to assist you.
Subscribe
Related Blogs
Drupal's Role as an MCP Server: A Practical Guide for Developers

"The MCP provides a universal open standard that allows AI models to access real-world data sources securely without custom…
What’s New in Drupal CMS 2.0: A Complete Overview
"Drupal CMS 2.0 marks a significant change in the construction of Drupal websites, integrating visual site building, AI…
Drupal AI Ecosystem Part 6: ECA Module & Its Integration with AI

Modern Drupal sites demand automation, consistency, and predictable workflows. With Drupal’s ECA module, these capabilities…


