One of the best things about Drupal is its incredible flexibility as Content Management System (CMS) with a bunch of modules that extend its functionality. One such module is the Geolocation field module.
In this tutorial, we will set up Geolocation field on a Drupal 8 website.
This module allows you to store longitude and latitude coordinates via a custom field. Other similar modules are Geofield and location but this module really shines because of its field widgets and formats. It comes along with two other submodules called Geolocation google maps and Geolocation html5.
The Geolocation - Google Places API sub-module allows you to select a location using an address or by clicking on the map.
The Geolocation html5 allows you to define your location using Html5 Geolocation API. Of course, your browser has to support the API and you have to allow it to access your location.
Install the Module
- Download the Geolocation Field module. Go to Extend → Search Geolocation and Geolocation - Google Places API → Install → Enable. This module is simple to Install since there is no dependency.
- If you are using Drush, run the following commands:
drush dl geolocation drush en geolocation geolocation_googlemaps
Step I: Managing Google Maps API Key
- Need a unique Google Maps API Key.
Google requires users to use a valid API key. Using the Google API Manager, you can enable the Google Maps JavaScript API. That will create (or reuse) a Browser key which you can use.
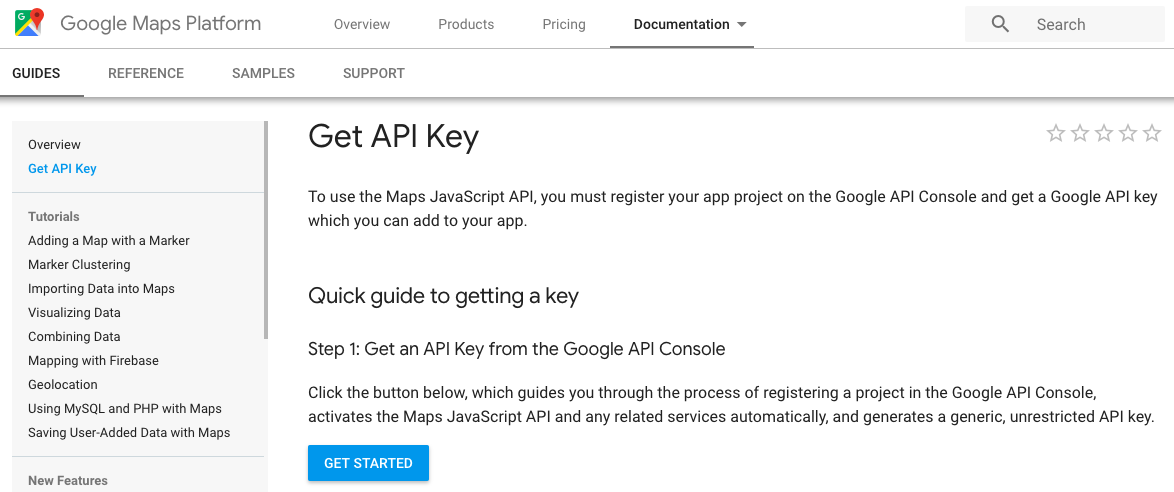
- Go to Google API Manager. Click on "GET A KEY" to get a key.
After that, you need to create a new project or use previous one.
- Click on "Next".
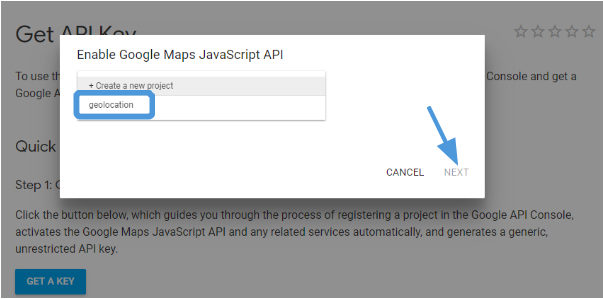
- Now, your API key is successfully generated and ready it is to use.
- Copy the key, just clicking on.

- Now go back to your Drupal site and integrate with your API.
- Go to Configuration → Click on Geolocation settings.
- Now, paste the unique API key into the Google Maps API key field.
- Next, click on Save configuration.
- You can configure Optional Google parameters, but we’re going to work with the default values for this tutorial.
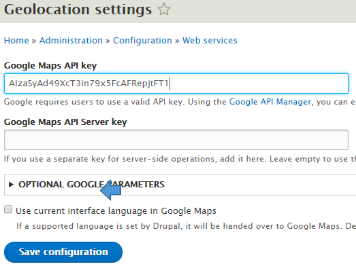
Cheers!! Google Maps API is successfully integrated with your site.
STEP II: Create Geolocation Field:
Now, we’ll start to create a field for Geolocation on the Article content type.
Note: You can even create a new content type for Geolocation field
- Create a content type. Go to Structure → Content types → Manage fields for Article.

- Click on Add Field button.

- Select Geolocation as a new field from the drop-down list. Enter Location into the Label field, and click on Save and continue.

- In Location page, enter the allowed number of values (which are limited). These settings apply to the Location field everywhere it is used. As default select 1 in this field.
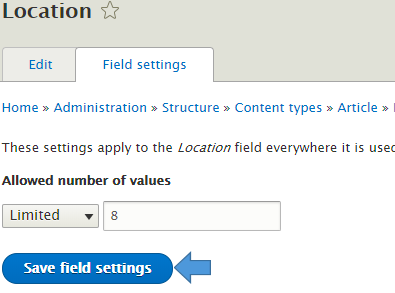
Now, click on “Save field settings”.
- Keep the location settings for Article page unchanged as of now and scroll down and click on Save Settings.
We have, now, successfully created our content type.
STEP III: Configure Geolocation Field
After creating the Geofield we will change the widget from latitude and longitude.
We could use html5 widget, which will just track your live location. This is where it gets really cool. Save and refresh the settings and there you have it - an interactive Google map, which is pretty neat.
In order to use the Google Map API key, which we already generated, we have to change a few setting in Display as well.
- Go to Structure → Content Type → Article → Manage from Display.
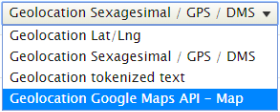
- Select “Geolocation Google Maps API – Map” as WIDGET from the drop-down list.
- Click on the cogwheel to configure the google maps settings.

You can set Default Longitude and Default Latitude value in widget setting. Moreover, you can select, automatically use client location, when no value is set and allow override the map settings when create/edit a content.
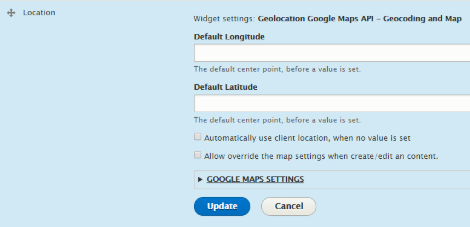
- In Google Map, the setting provided additional settings by Google Maps.
- You can change General settings like Height, Width, Default map type, Zoom level, Max zoom level, Min zoom level
Fields
Values
Height
Enter the dimensions and the measurement units. E.g. 200px or 100%.
Width
Enter the dimensions and the measurement units. E.g. 200px or 100%.
Default map type
Select from the drop-down
Zoom level
Default resolution level
Max zoom level
Displayed the maximum zoom level on the map
Min zoom level
Displayed the minimum zoom level on the map
- You can even configure Controls, Behavior, Gesture Handling, Marker and also add JSON styles (A JSON encoded styles array to customize the presentation of the Google Map).
- Click on Update and scroll down to save.
Configure Manage Display
- Click Manage display. Change the format field to Geolocation Google Maps API - Map from the drop-down.
- A Label should be always above and not hidden.
- Change the region using the drag and drop anchor. I drag it next to image field. And the results look perfect.
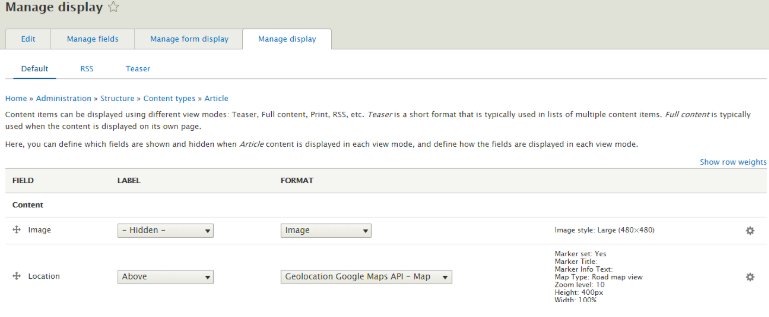
STEP IV: Using Google Map in Content Type
- Create a new Article content or modify previous one. Scroll down to the location field to point a location.
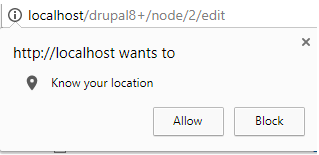
- The next step is to check your own location. I saw a notice on top of the chrome, asking me to use my computer's location. I'll go ahead and Allow it and it brings in my exact location.
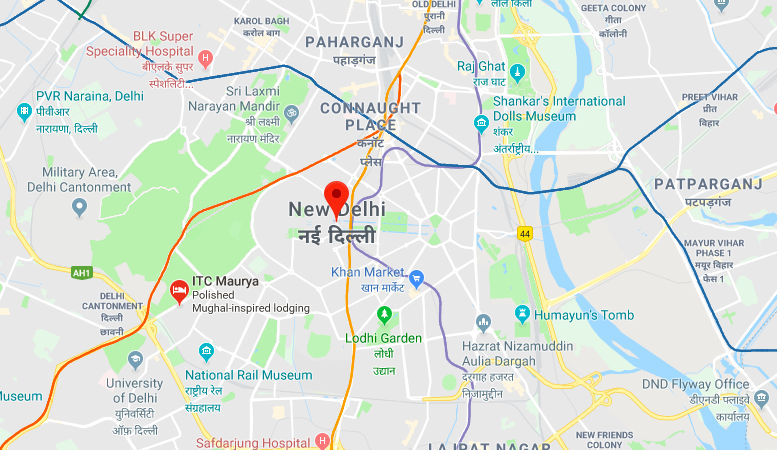
If you want to select a location directly by clicking on the map. Moreover, you can even browse the location in the search field.
- Once you’ve selected a location and saved the form, then on the article page you can see the Longitude and Latitude value of that location.
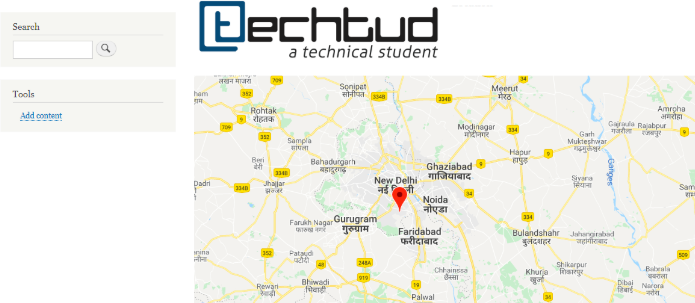
- You can even select the “Geolocation HTML5” instead of "Geolocation Google Maps API - Map" In “Display”.
- Select “Geolocation HTML5” WIDGET as Location in “Manage form display”.
- Change “Manage display” FORMAT for Location field.
- Go to the article content page and refresh it. You can see the page like this.

That’s it! You’ve successfully integrated geolocation field module in the content. I hope this article helped you in identifying the possibilities behind geolocation field and how to use it.
If you encounter any issues, let us know with your comments below.
Subscribe
Related Blogs
Drupal's Role as an MCP Server: A Practical Guide for Developers

"The MCP provides a universal open standard that allows AI models to access real-world data sources securely without custom…
What’s New in Drupal CMS 2.0: A Complete Overview
"Drupal CMS 2.0 marks a significant change in the construction of Drupal websites, integrating visual site building, AI…
Drupal AI Ecosystem Part 6: ECA Module & Its Integration with AI

Modern Drupal sites demand automation, consistency, and predictable workflows. With Drupal’s ECA module, these capabilities…


