How to create Barrio sub-theme in Drupal 8 using SaSS Barrio Starterkit
A popular front-end framework for building websites, Bootstrap ships pre-built CSS and JS components helping in building sites fast. A complete package that includes the important components such as a grid system, buttons, drop-down, responsive form elements, carousel, it saves your time spent on styling.
Bootstrap Barrio is a sub-theme of the Bootstrap Theme. It is based on Twitter Bootstrap, a sleek, intuitive, and yet another powerful front-end framework for faster and easier web development. Bootstrap Barrio focuses on layout flexibility and customization using the theme parameters and the Skinr module.
In Drupal 8 Barrio is the base theme. It simply integrates Drupal with Bootstrap 4. Barrio has all the benefits of Bootstrap 4 and so here is a quick comparison between Bootstrap 3 and Bootstrap 4.
Difference between BootStrap 3 and 4
| Bootstrap 3 | Bootstrap 4 |
|
|
|
|
|
|
|
|
|
|
Why should you Opt for Barrio?
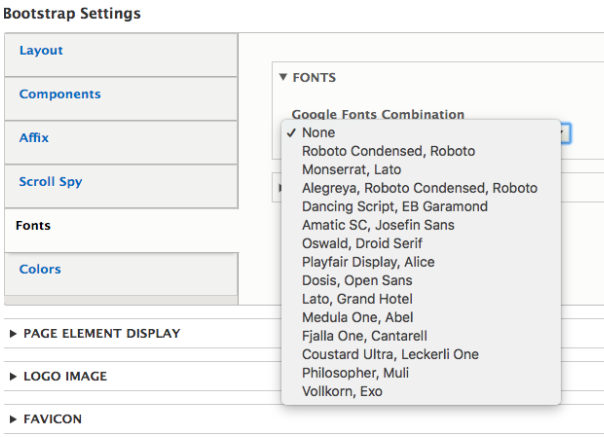
- Predefined google font combination
Providing an ultimate collection of Google font, it is quite easy to change the font with Barrio. All you need to do is just select the font you like (after installing Barrio) and set it up as the default theme in the settings.
When changing the setting, your screen will look something like the image below.
- 1, 2 & 3 automatic column layout
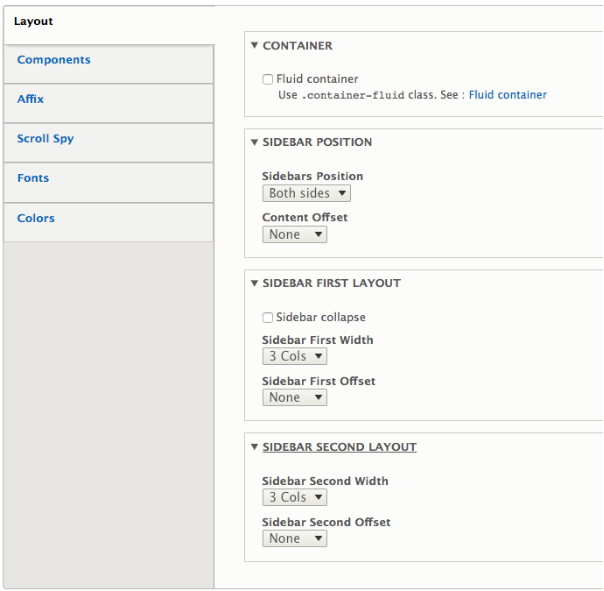
Other than Google fonts combination, it has a very flexible column layout called 1, 2 & 3 automatic column layout. Here, you can also specify the layout and position of the sidebars in the settings. When changing the settings your screen will look something like the image below.
- Bootstrap standard markup
Barrio uses Bootstrap 4 standard markup which provides greater flexibility and helps in creating mobile friendly website faster.
- Improved form elements
Improved Bootstrap form elements have been integrated into Barrio. It is better-formed control as well as has improved form element appearance in comparison to Bootstrap 3.
- Scroll spy
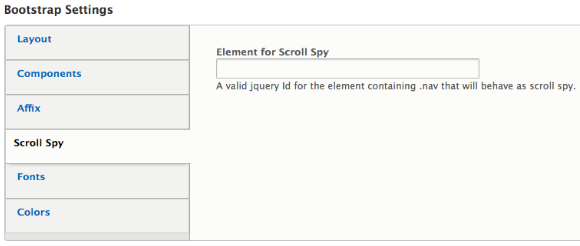
Scroll class on the body (on window scroll) means when you scroll the window it automatically updates the navigation. You just have to provide the id containing navigation and it automatically will start the scroll spy.
Go the Admin > Appearance > Settings > Bootstrap settings > Scroll spy > Enter a valid jquery id and it will act as the scroll spy.
- Container and container fluid layout
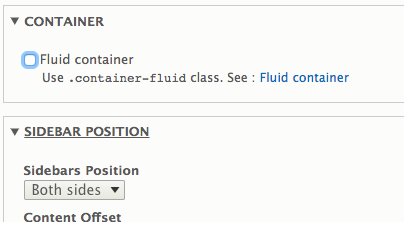
Here you can select, whether you want a container for fixed with and full container taking the entire with of your viewport. Both are responsive which means they change the layout based on the screen width. Container-fluid continuously resizes the width of your window/browser by any amount, leaving no extra empty space on the sides ever.
In case you want to use full-width container, you can change it through Bootstrap settings > Layout and then click on the container and check fluid container and save the configuration.
- Affix
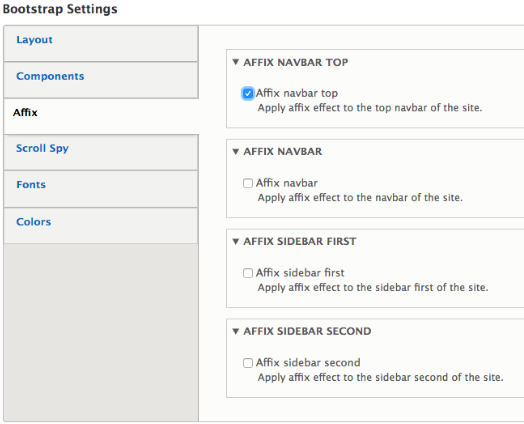
Affix makes an element to stick to a particular position while scrolling. It is normally used to make navigation or sidebar fixed to a particular position. Here, you can make affix navbar or sidebar just with a click.
- Compatibility with Material Design Bootstrap
This theme is compatible with Material Design Bootstrap. Material Design for Bootstrap is an open source toolkit based on Bootstrap for developing Material Design apps with HTML, CSS, and JS. Quickly prototyping your ideas or build your entire app with our Sass variables and mixins, responsive grid system, extensive prebuilt components, and powerful plugins built on jQuery.System messages color scheme relies on it.
Installation
- Download and install Bootstrap Library module
The main function of Bootstrap Library Module is to correct browser support issue, update your bootstrap version and at times with advanced cdn file loading. You can download the Bootstrap Library Module from Drupal.org. You can simply copy the link of the zip or tar.gz file and install it on your site.
Also, you can use Drush to install the bootstrap library module with the following command
To enable the module go to Manage > Extend > Search bootstrap library > Enable.drush dl bootstrap_library
Or you can use the Drush command to enable itdrush en bootstrap_library - Downloading and installing barrio theme
You can download Barrio from Drupal.org. Copy the link to zip or tar.gz file and install it on your site from the following steps
Appearance > Install new theme > Paste the link > Install.
Or you can use the following drush commanddrush dl bootstrap_barrio
Save your theme as the default theme.drush en -y bootstrap_barrio
- Define Barrio settings
Define Barrio Settings according to user requirements. It is easy to customize and use.
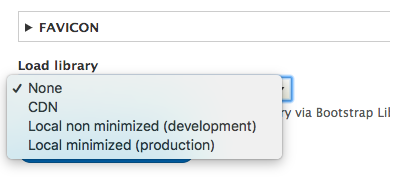
- Choose how to load Bootstrap files, CDN or locally
When selecting the load library, you will have three options. Select the bootstrap library according to your requirement. If CDN is selected, the library version must be configured on @bootstrap _library _link and other two options are local minimized (development ) and local minimized (production).
How to create sub-theme using Barrio as the base theme?
For creating subtheme you can use Bootstrap 4 Barrio SASS. it also has sass implementation. This subtheme overrides almost every CSS from Drupal and replaces it with Bootstrap variables ( wherever possible ) in order to generate from roots a new set of CSS files. Reshaping the whole Bootstrap definition according to personalizations set.
- Install bootstrap_barrio first and enable it
- Install Bootstrap 4 Barrio SASS
- You can download it from Bootstrap 4 Barrio SASS simply copy the link to zip or tar.gz file and install it in your site from the following steps
- Appearance > install new theme > paste the link > click on install
- here I am using drush command for installing it
- Command : Drush dl bootstrap_sass
- Install gulp: npm install --global gulp-cli
- Install Bootstrap latest version: npm install [email protected]
- Optional install Material Design Bootstrap: npm install mdbootstrap
- Install gulp files: npm install gulp browser-sync gulp-sass gulp-autoprefixer gulp-compress gulp-minify-css gulp-sourcemaps gulp-uglify gulp-concat --save-dev
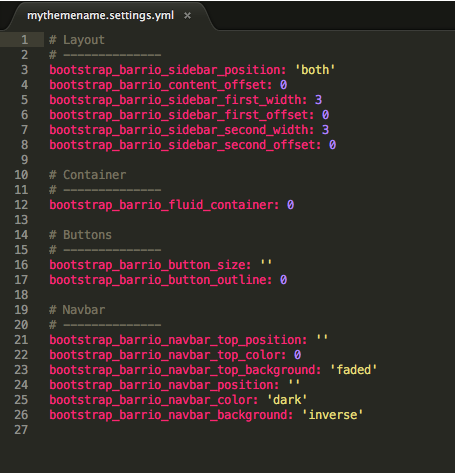
After that , you can rename the folder with the name your theme name , Here i am using mythemename as my theme name . Now , we have to replace boostrap_sass with our subtheme name in the following file
- /config/install/bootstrap_sass.settings.yml
Rename it as mythemename.setting.yml
- /config/schema/bootstrap_sass.schema.yml
Here, we have the schema for the configuration files of our subtheme. Rename it as mythemename.scheme.yml and also rename it in your theme settings and you can also updates its label
- Update /bootrap_sass.libraries.yml
Rename it as mythemename.libaries.yml
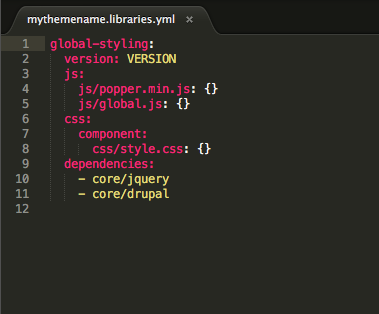
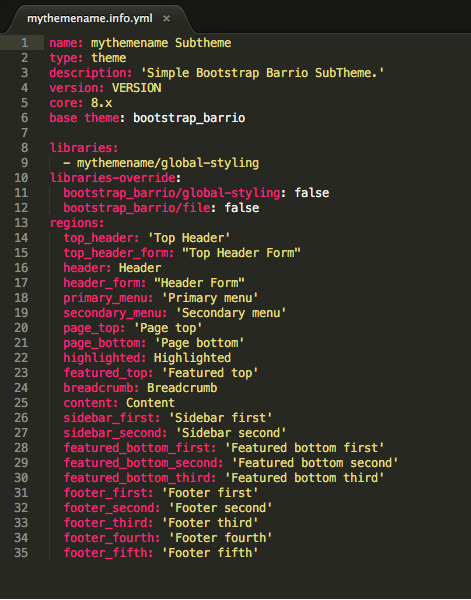
- Update /bootsrap_sass.info.yml
Rename it as mythemename.info.yml. Then update your theme name and also its description. This file is mandatory to define the theme. You can also update metadata, libraries, and block regions according to your requirements.
- Update the screenshot.png
Update the screenshot.png present in the theme folder. It will be used in the appearance page to describe the look of your theme.
- Update logo.svg
Its can be used in the header of your website.
- Install and set the default
Now go back to the appearance where you will find your theme. Install and set it as your default theme.
Note: Make sure you have installed the barrio base theme.

And you are done!
Subscribe
Related Blogs
Drupal's Role as an MCP Server: A Practical Guide for Developers

"The MCP provides a universal open standard that allows AI models to access real-world data sources securely without custom…
What’s New in Drupal CMS 2.0: A Complete Overview
"Drupal CMS 2.0 marks a significant change in the construction of Drupal websites, integrating visual site building, AI…
Drupal AI Ecosystem Part 6: ECA Module & Its Integration with AI

Modern Drupal sites demand automation, consistency, and predictable workflows. With Drupal’s ECA module, these capabilities…


