Web services have evolved in the last two decades from XML RPC to SOAP to REST (and now recently to GraphQL). All of these are architectural styles for designing web services that specify certain principles. We no longer just serve HTML pages over HTTP and Drupal has acknowledged that by adding the support for REST into the core.
This means that we can create RESTful APIs using Drupal as a backend solution. These APIs can be consumed by powerful Javascript frameworks like Angular, Ember, React or Vue to build modern Single-Page applications (SPA) or native mobile applications for Android/iOS.
However, the core modules that provide this functionality are not enabled by default. These include RESTful Web Services, HTTP Basic Authorization, Serialization, and HAL. They allow entities, both content, and configuration, to be shipped in JSON, XML or HAL + JSON data formats, and also provide cookie and basic_auth authentication mechanisms.
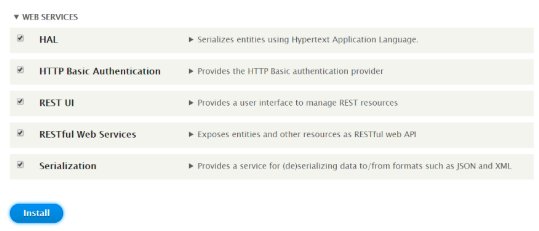
Before understanding how to expose, configure and utilize these resources, let us quickly enable these core modules, along with a very useful contributed module, REST UI. Make sure to at least enable RESTful Web Services and Serialization before installing REST UI.
Using Drush
$ drush en hal basic_auth rest serialization -y
$ drush dl restui && drush en restui -y
Using Drupal Console
    $ drupal module:install hal basic_auth rest serialization
    $ drupal module:download restui && drupal module:install restui
Using UI
- Navigate to Manage → Extend → Install new module and enter the .tar.gz or .zip URL of the REST UI module and hit Install
- Once the downloader and installer are finished downloading, click on “Enable newly added modules”.
- Select all the modules under ‘Web Services’ package and click on Install.
Exposing REST resources manually
To expose a REST resource, we need to import its REST resource configuration i.e. rest.resource.*.yml configuration file into the active configuration of our Drupal site. For example, the following rest.resource.entity.node.yml declares the verbs (or methods), data formats, and authentication mechanisms. We can import this file using
admin/config/development/configuration/single/import or by using drupal console.
drupal config:import:single --file="/path/to/rest.resource.entity.node.yml" .
dependencies:
    module:
      - basic_auth
      - hal
      - node
      - serialization
      - user
  id: entity.node
  plugin_id: 'entity:node'
  granularity: resource
  configuration:
    methods:
      - GET
      - POST
      - DELETE
      - PATCH
    formats:
      - hal_json
      - json
      - xml
    authentication:
      - basic_auth
      - cookie
We need to do this for every resource which is to be made available. To makes things easier, a contributed module REST UI can be used. This module lists all the available resources and provides an admin interface to manage these configuration files for us.
Exposing REST resources using REST UI
- Navigate to Manage → Configuration → Web services → REST. This lists all the available resources that can be exposed.
- Now, to enable any of these, click on “Enable” button next to the resource you wish to expose.
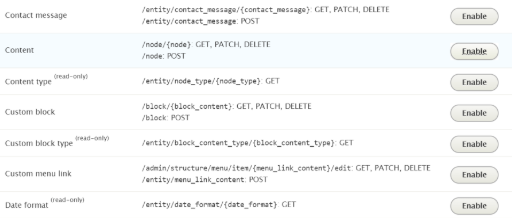
Enabling the resource - Select granularity as either method or resource. The method granularity lets us define data formats and authentication methods for each of the verbs, giving us more control. But for now, let’s use the resource granularity.
- Next, select the HTTP methods or verbs you want to enable for this resource. POST, GET, PATCH and DELETE are used to perform CRUD (Create, Read, Update, and Delete) operations on the resource.
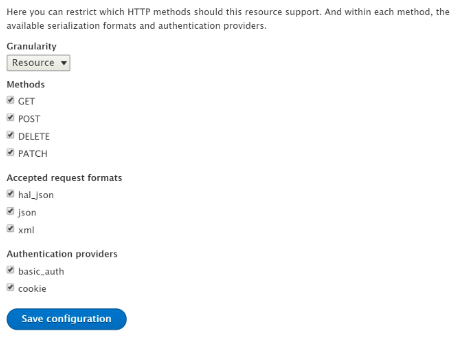
Configuring the resource item - Now select the authentication mechanisms. Depending upon the permissions of the resource, the RESTful web service will require authentication for performing certain operations, like creating or deleting an entity. You can also use OAuth 2.0 using a contributed module.
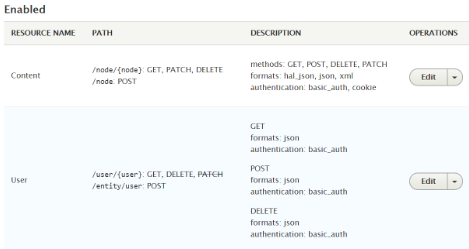
Similarly, enable and configure all the resources you wish to ship via the API.
Testing our REST API
Now that we have enabled the required resources, and managed their configuration, let’s test the API by performing basic CRUD operations. You may use a client like Restlet Client or Postman, or use cURL for testing.
Add following request headers before proceeding:
|
Key |
Value |
|
Authorization |
Basic {base64 encoded username and password} |
|
Content-Type |
application/hal+json |
|
X-CSRF-Token |
{your-x-csrf-token} (available at /rest/session/token) |
- Creating a node using POST
Make a POST request at {your-drupal-site}/node with following raw data in the request body.{ "_links":{ "type":{ "href":"{your-drupal-site}/rest/type/node/article" } }, "title":[ { "value":"Test node title" } ], "body":[ { "value":"Test node body", "format":"plain_text", "summary":"Test node summary" } ] }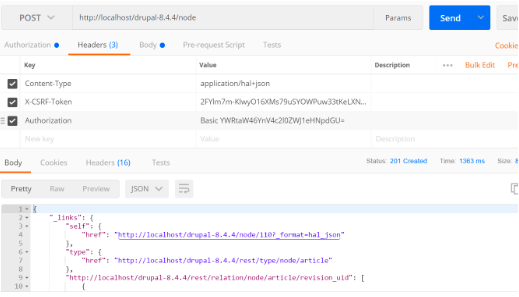
You should receive a 201 Created response code along with created node in hal+json format. - Retrieving a node using GET
Make a GET request at {your-drupal-site}/node/{node_id}. Add a parameter _format with value either as json, hal_json, html, or xml.
As you may notice, it returns a bunch of extra information that may not be needed. You can create a view with REST Export and specify the required fields.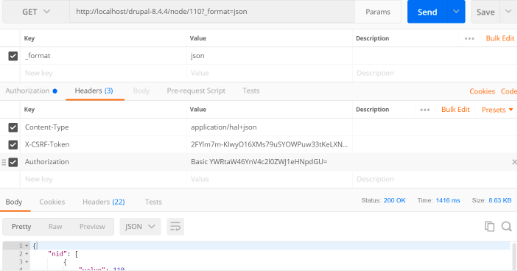
You should receive a 200 OK response code along with node in the specified format - Updating a node using PATCH
Make a PATCH request at {your-drupal-site}/node/{node_id} along with the updated node data in the specified format (similar to POST).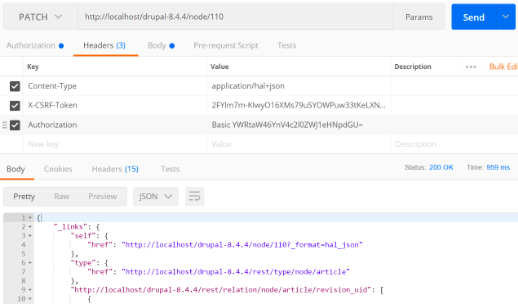
You should receive a 200 OK response code along with updated node in the specified format. - Deleting a node using DELETE
Make a DELETE request at {your-drupal-site}/node/{node_id}.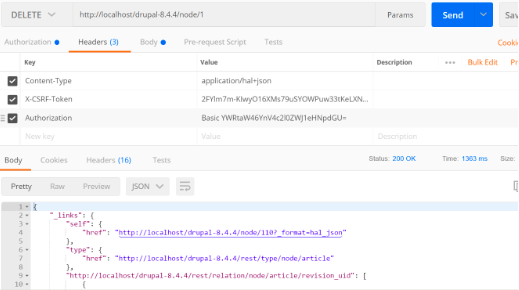
- Creating a custom REST resource
Finally, if you want to add a custom REST resource, we need to create a custom module, and a resource plugin by extending the Drupal\rest\Plugin\ResourceBase class. You can generate most of the boilerplate code using Drupal console.$ drupal generate:plugin:rest:resourceThen implement the methods for each of the required verbs. Enable the custom module, and visit the admin/config/services/rest. The custom resource will be available to be enabled.
Conclusion
By integrating the REST services of Drupal with the REST UI module, we can quickly deploy RESTful APIs without writing a single line of code. It eliminates the need for creating and importing the YML files for each resource manually. If you are planning to go headless with Drupal, you may also want to check out the Services module.
Subscribe
Related Blogs
AI Fairness: A Deep Dive Into Microsoft's Fairlearn Toolkit

Artificial intelligence (AI) has changed the game across industries, especially in financial services. From automating…
API Documentation Tool: 10 Best Tools For 2025
A Google search for ‘Best API Documentation Tool’ will show many results. The growing number of API documentation tools…
Debunking 6 Common Software Testing Myths

A flawless product delivery requires a perfect combination of both development and testing efforts. Testing plays a vital…


