One thing that you may expect from a content management system is the ability to schedule articles or posts at a given time. Unfortunately, Drupal does not support this functionality out of the box. But the same can be achieved with the help of a contributed module Scheduler.
This module allows us to schedule an article (or content of any other type), to be published (or unpublished) at a given date and time. This is essentially targeted towards improving the experience of content editors by providing them the ability to automate the publishing process.
Why Automate?
Before looking at how to install, configure and use the Scheduler module, let us see how automating publishing of content can help.
- Saves human efforts when publishing article
One of the very basic problems that article scheduling solves is saving the human efforts in the future. I can schedule an article for the weekend without working on that day.
- Your editors will love it
Scheduling the articles allows the editors to be flexible with their timings. It makes sense to schedule the publishing when they are not available.
- Consistent updates attract loyal visitors
A strong publishing flow complete the editorial processes sorting out the mess out of the content management.
- Gather loyal readers
Publishing good quality content consistently eventually gathers a loyal group of readers or visitors on your site. Automating the process of publishing will ensure that readers visit your site regularly.
- Reach your targeted audience
It is possible that your site attracts more users during a certain time of the day or day of the week. Making articles or content live during these peak intervals will help the content reach more audience.
Downloading and Installing the Scheduler
The scheduler module requires few of the Drupal core’s modules to be enabled – Actions, DateTime, Field, Node, Text, Filter, User, System, and Views. Once you make sure all of these are enabled, download and install the Scheduler module by following any of the below methods:
Using UI
- Navigate to Manage → Extend → Install new module and enter the .tar.gz or .zip URL of the Scheduler module and hit "Install"
- Once the downloader and installer finished, click on "Enable newly added modules".
- Find Scheduler in the list of modules, select it and click on "Install". Additionally, you may also install its sub-module Scheduler Rules Integration.

Installing Scheduler using UI
Installing Scheduler using UI
If you wish to install the module through the terminal, first navigate to the root directory of your Drupal site and then use any of the following methods.
$ cd /var/www/html/drupal8
Using Composer
- Add Scheduler package using composer
$ composer require "drupal/scheduler" - Enable the module by navigating to Manage → Extend, selecting Scheduler and click Install. Additionally, you may also install its sub-module Scheduler Rules Integration.
Using Drush
$ drush dl scheduler
$ drush en scheduler scheduler_rules_integration -y
Using Drupal Console
$ drupal module:download scheduler
$ drupal module:install scheduler scheduler_rules_integration
Scheduler Permissions
The module declares three permissions – View scheduled content list, Schedule content publication, and Administer scheduler. You may want to give your content editor the necessary permissions to schedule and view scheduled content publications from admin/people/permissions.

Enabling Scheduler for Content types
To use Scheduler, first, we need to enable scheduling for the required content types.
- Navigate to Manage → Structure → Content types and click on “Edit” from the drop-down against the content type you wish to enable scheduling for.
- Scroll down to the Scheduler in the vertical tabs and click on it to expand its configuration.
- Check Enable scheduled publishing for this content type, optionally check Change content creation time to match the scheduled publish time. You can even make it a mandatory field by checking Require scheduled publishing.
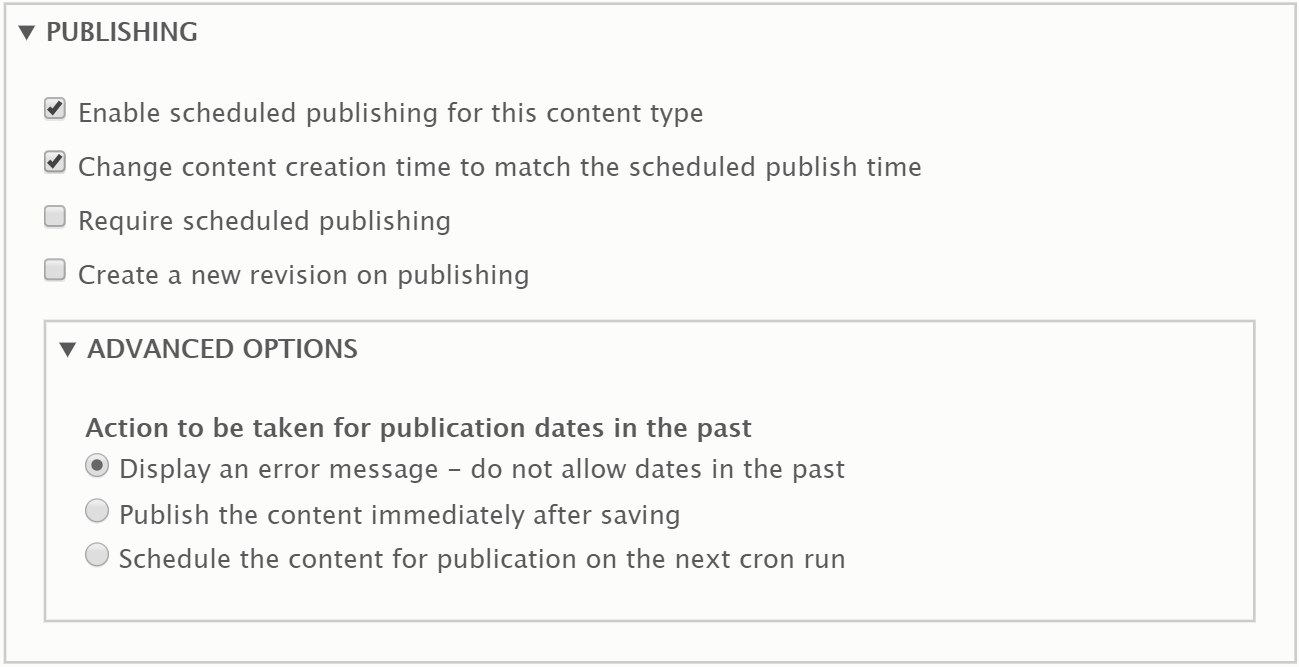
Enabling scheduling for article content type - You may also configure how the content editor views the scheduler options while editing – vertical tab or separate fieldset.
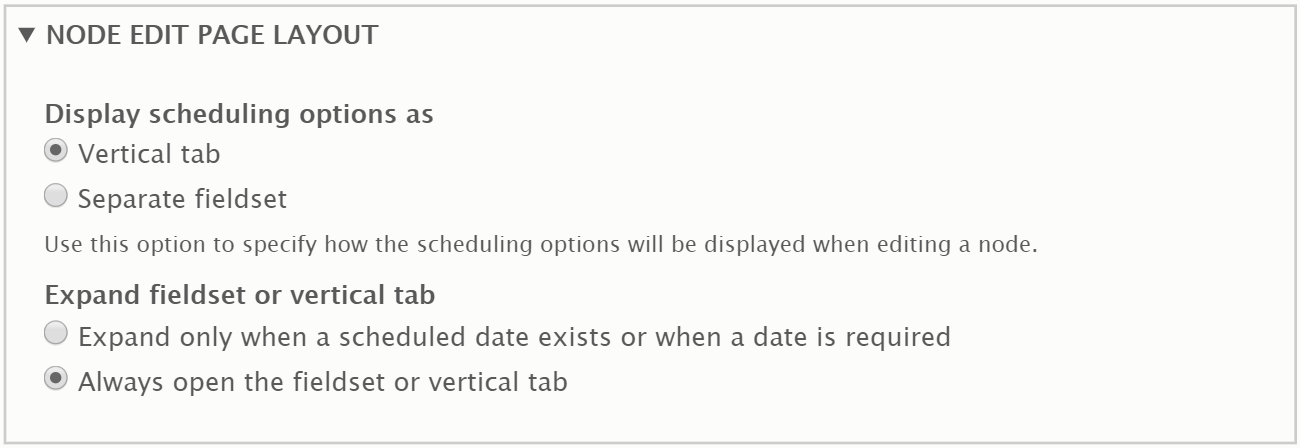
Configuring display options for the scheduler - Similarly, you can also allow scheduling of unpublishing the content types. This may come handy for content items which need to be expired such as events or polls.
Scheduling content publishing
Now that we have enabled scheduling for the required content types, we can see a new vertical tab or separate fieldset (depending on what you selected earlier) in the content’s form display.
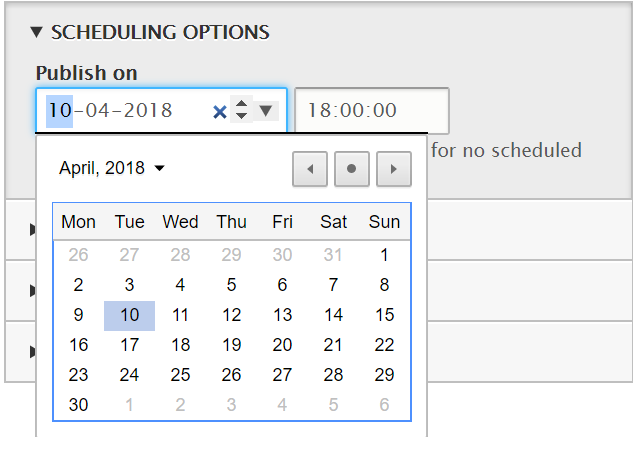
Fill in all the fields of your content types, enter date and time, check Publish and hit Save. The post will be scheduled for later by the Scheduler. To publish it immediately, simply leave the scheduling options empty.

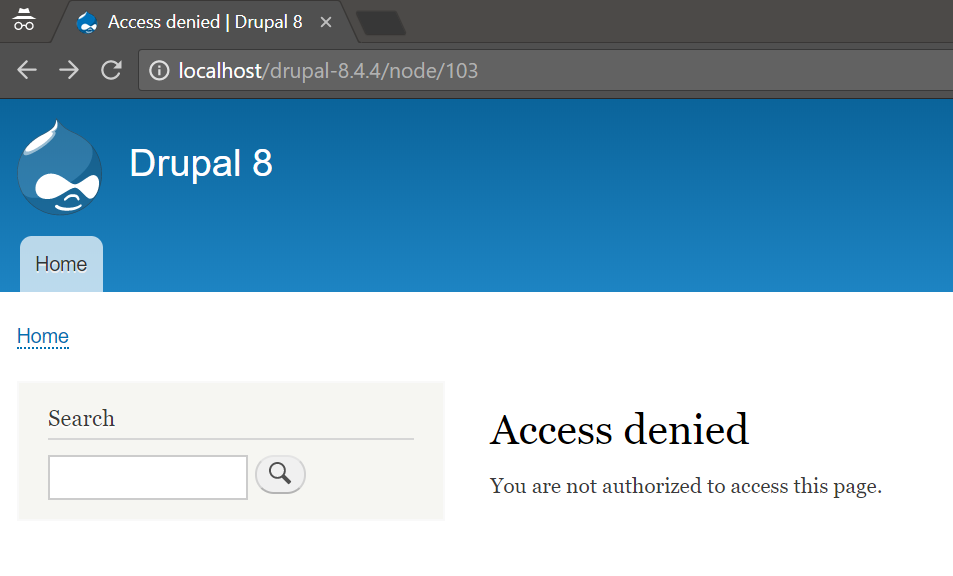
Only the author of that post will be able to view the post until it is published, others will see an Access denied page if they try to go the URL of the scheduled content.
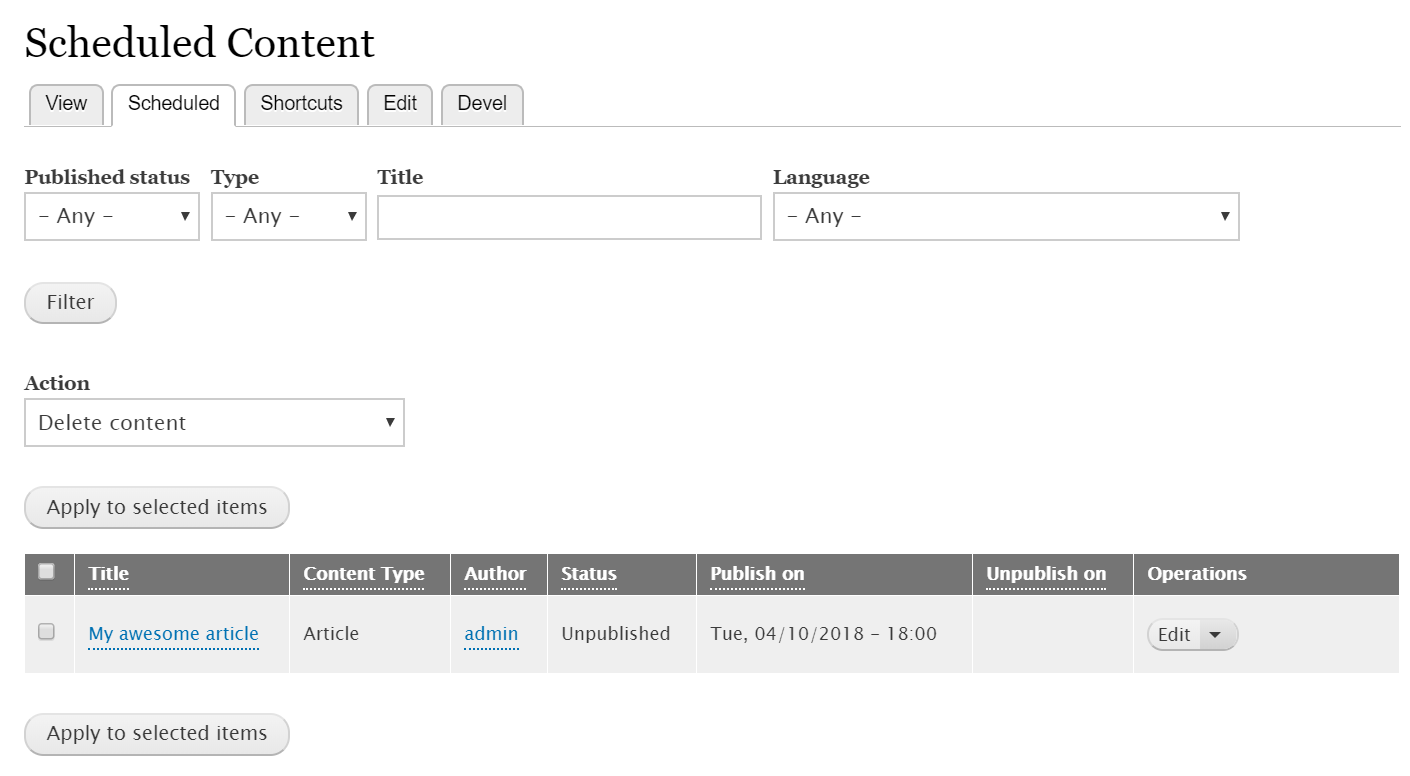
All the scheduled content can be seen by an author from the Scheduled tabs on their profile page i.e. user/{user_id}/scheduled.
The downside of the Scheduler Module
As you may have noticed by now, the content did not actually get published at the specified date and time. This is due to the fact that this module relies on Drupal’s automated cron to publish or unpublish the scheduled content. It works by implementing hook_cron, which executes only when – a user visits your site and the difference between the timestamps of this request and cron’s last execution is greater than the configured interval of cron. So, in the worst case, if your site does not get any traffic, cron will never execute and your scheduled content will never get published or unpublished.
To combat this, the module provides the ability to run a ‘lightweight’ cron that will make sure to publish the scheduled content. You may run it using drush or from outside the site by sending a request at {your-drupal-site}/scheduler/cron/{your-cron-key}. Your cron key will be available at admin/config/content/scheduler/cron.
Originally, cron is a UNIX utility which is used to schedule repetitive tasks. If you have access to your server through ssh or your hosting provides the ability to run cron, you can use the following cron expression to make sure that the scheduler’s lightweight cron executes after every 30 minutes.
*/30 * * * * drush scheduler-cron

or

*/30 * * * * drush sch-cron
If you want to execute cron from outside the site, you can use the following expression to make a request.
*/30 * * * * wget -q -O /dev/null "{your-drupal-site}/scheduler/cron/{your-cron-key}"

or

*/30 * * * * curl -s -o /dev/null "{your-drupal-site}/scheduler/cron/{your-cron-key}"
Scheduler Rules Integration submodule
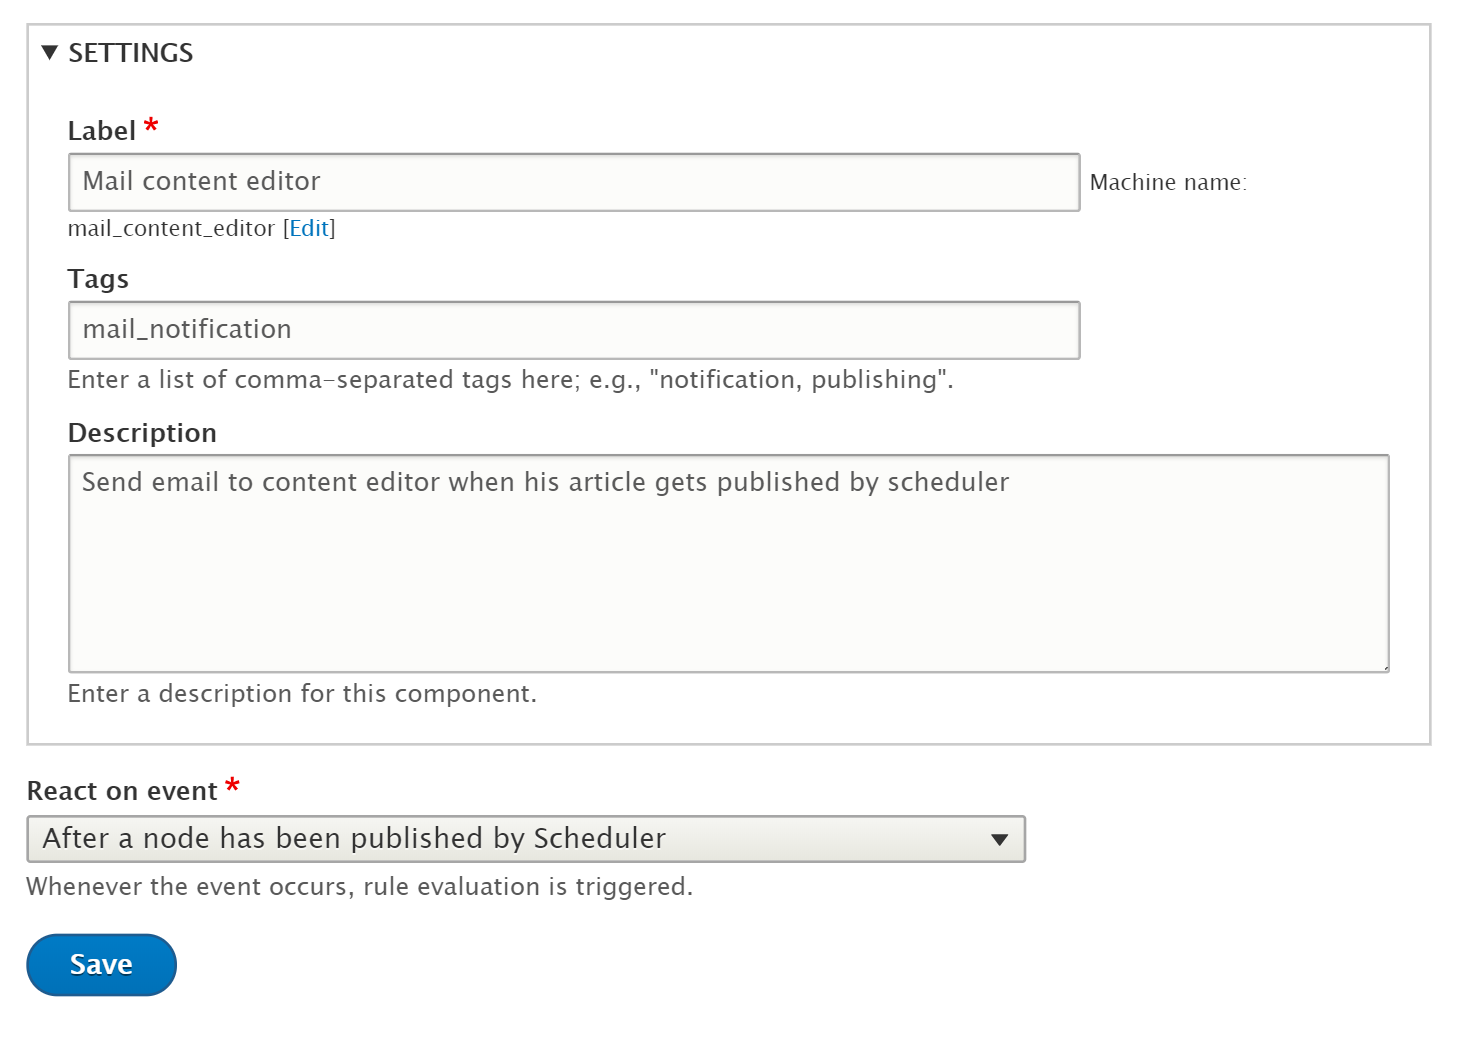
The project comes with a sub-module that provides events, conditions, and actions for the Rules module. If you are familiar with Rules, you can get creative and generate some interesting automated workflows. For example, you can send an email to the content editor notifying them that their article or content has been published by Scheduler. This can be achieved by creating a rule with an event as After a node has been published by Scheduler and action as Send an email.
What’s in for developers?
It is also worth mentioning that Scheduler provides hooks and events that can be implemented by your custom module. The API is well documented within scheduler.api.php.
Available hooks include hook_scheduler_nid_list, hook_scheduler_nid_list_alter, hook_scheduler_allow_publishing, and hook_scheduler_allow_unpublishing. You can implement them just like any other hooks by defining hook functions in the .module file of your module.
The events include publish_immediately, pre_publish_immediately, pre_publish, pre_unpublish and unpublish. You need to register an event subscriber by implementing EventSubscriberInterface and declare the service in the .services.yml file. Return the array of events from the getSubscribedEvents method and define functionalities in the methods of your event subscriber class.
Conclusion
Scheduler module focuses on improving the experience of the content editors by giving them the ability to auto publish or unpublish content items. As it depends on cron for its scheduling, you may face some issues as discussed above. If you feel this module does not offer the required flexibility, you may build a custom solution or have a look at the Schedule Updates module (not covered by Drupal’s cr advisory policy).
Subscribe
Related Blogs
Drupal's Role as an MCP Server: A Practical Guide for Developers

"The MCP provides a universal open standard that allows AI models to access real-world data sources securely without custom…
What’s New in Drupal CMS 2.0: A Complete Overview
"Drupal CMS 2.0 marks a significant change in the construction of Drupal websites, integrating visual site building, AI…
Drupal AI Ecosystem Part 6: ECA Module & Its Integration with AI

Modern Drupal sites demand automation, consistency, and predictable workflows. With Drupal’s ECA module, these capabilities…


