According to a survey, 56% of users spend more time on sites in their own language than they do in English.
Cost effective and increased traffic are not the only two reasons on why you need to opt-in for multilingual websites.
Multilingualism on the web has a huge business advantage. It saves an incredible amount of time and money while delivering a better user experience to larger audiences.
Translating your website into multiple languages (or even one language) can be a big undertaking. And while things might seem easy, that might not be the case every time.
Drupal 8 supports multilingualism out-of-the-box. It provides content translation in 94 languages. What use to take more than 22 modules earlier in Drupal 7 can now be done in 4. Drupal 8 is easy and efficient for multilingual businesses.
In this blog, we will learn how to translate your Drupal 8 website in more than one languages.
Drupal Modules to Make your Site Multilingual
The pre-requisites involve these four Drupal 8 modules.
- Language
- Interface Translation
- Content Translation
- Configuration Translation
- Language: It is the base component needed. This module is used for adding and choosing the languages. It maintains the list of languages on your site supporting every dependency to store information.
Allow Drupal to add and choose the language of their choice. Natively, it is available in 94 languages.
- Interface translation: Translates the whole interface from the core and contributed modules. It translates the built-in user interface automatically and improved customization for translating custom.
- Content Translation: This module translates all the content types and content entities. It has field level translations inbuilt in its API. Providing a language selector, it allows you to select the languages with just a checkbox.
- Configuration Translation: It allows you to translate text that is part of the configuration, such as field labels, the text used in views, field settings, etc. It also has a built-in responsive translation interface.
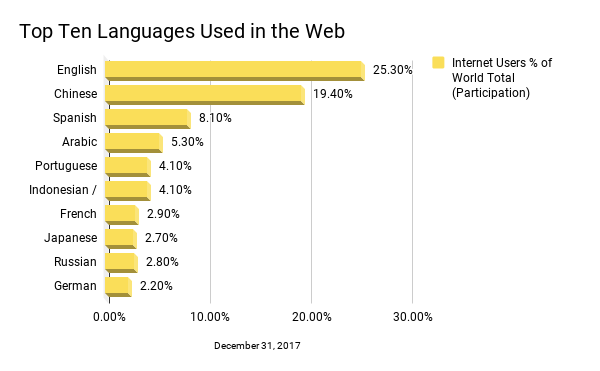
“Keeping your website only in English means ignoring the next 75% plausible market.”
Step to Make your Drupal 8 Site Multilingual
- Enabling the Modules
Install Drupal on your system. The above mentioned four modules come out-of-the-box.
Go to Extend and enable all the four modules in the Multilingual section.
- Adding Languages
The most important module is the language. It is used to install and select the language.
Since you have already enabled it in the previous step, choose the languages you want to configure.
Go to Home > Administration > Configuration > Regional Language > Install language of your preference > Add language.
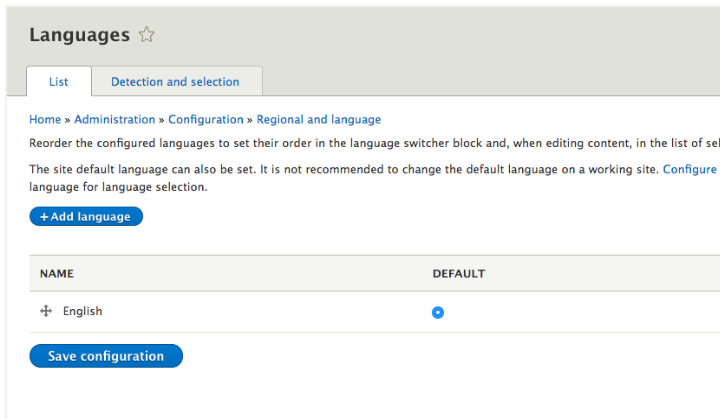
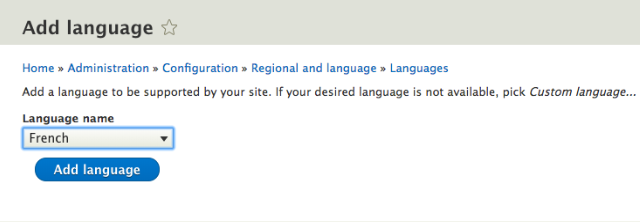
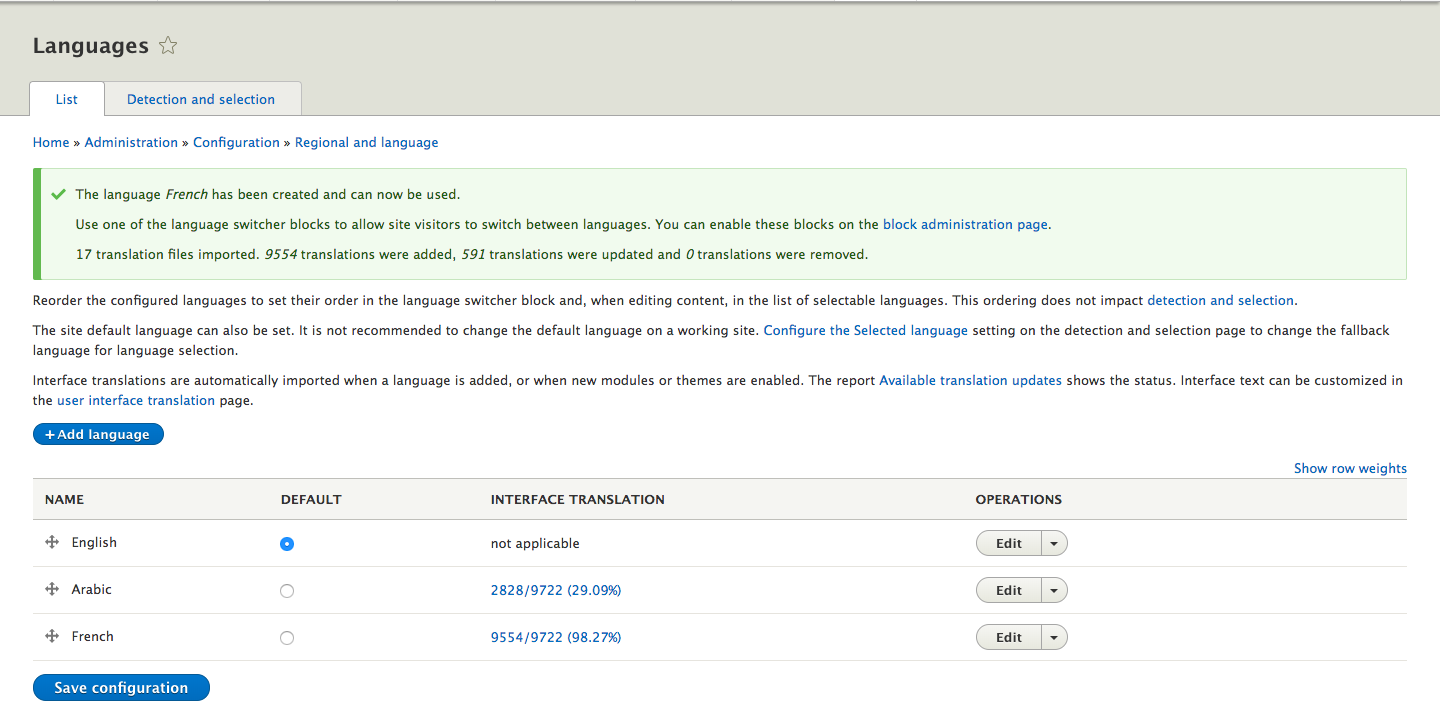
Wait for the translations to finish downloading. Once done, you will be returned to the Language page, with a confirmation message and the new language will be shown as in the image below.
- Enabling Language Negotiation
To let users know of the other language options available, Drupal provides the language detection method which detects the most used language of the user. It then shows the user with a pop up to translate the website without forcing the user to do so.
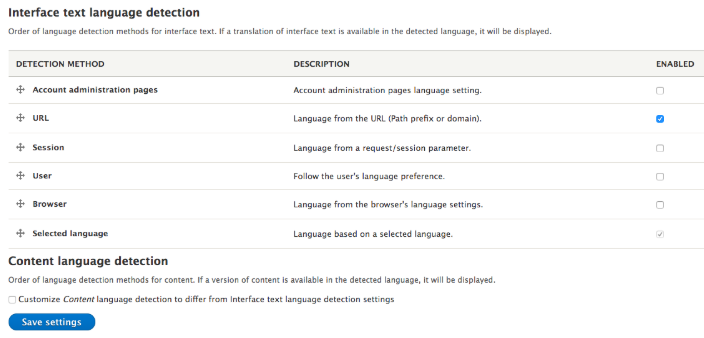
You can set the language detection method of checking on the checkbox of your choice by going to Configuration > Regional and Language > Languages > Language Detection and Selection.
There are various built-in language negotiation methods available such as the following:
- URL: This method is enabled by default and will be first on the list. If the language is specified in the URL then the page will be available in that language. In case it is not, then other methods will be preferred.
-
Browser: It detects if the user has configured any language preference in the browser.
-
User: It will show follow user language preference
-
Selected language: it will show the language selected by the user from language switcher block
-
Session: It detects the language from the session or request parameters.
You can create your own language detection method my making your custom module using API methods or contributed module like geolocation.
-
Placing the Language Switch Block
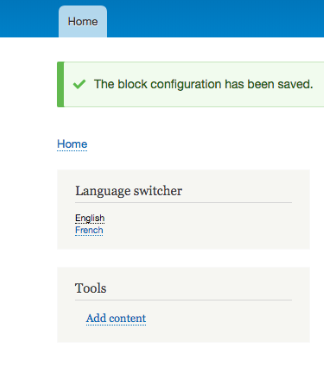
Once the language module is installed, the language switcher block will be available by default. It allows the site visitors to switch between languages of their preference.Place the language switcher block in the desired place on your website. However, this block will not work until you add translations.
-
Translating the Interface
Now, you need to translate the interface, the content on the page. This will also add options of available language updates for the user.Go to Home > Administration > Report > Available translation updates .
Check for the available updates. Click on check manually updates and if you have any updates click on update translations button and update all translations for you.
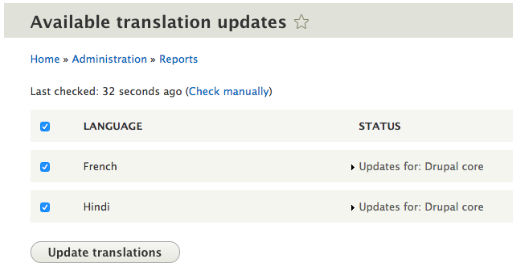
Go to home page and change the language from the language switcher and check if the interface is translated to the language chosen by you.
Here I have selected French in the language switcher block so my admin menu is now translated to the French.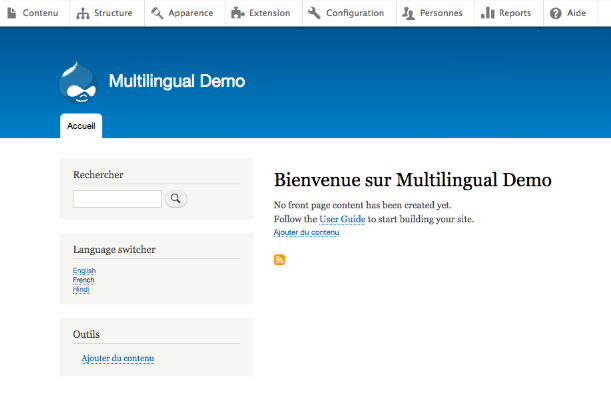
Home > Administration > Configuration > Regional and language > User interface translation
Here we also have a user interface translation screen which is the hub for translation it provides the list of all the translated strings you can update it according to your choices.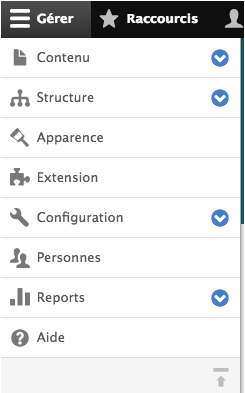
-
Translating the Content
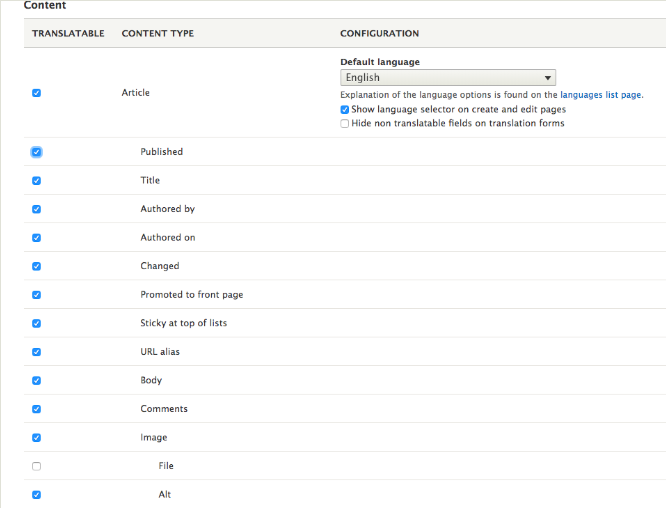
Now, enable the content translation module. It allows users to translate content entities. A new translated column will be added to all the content entities.
Go to Home > Administration > Configuration > Regional and language > Content language
Select the content type, taxonomy, menu link you want to translate your content into. After selecting the entity, you will have to choose all the fields.
Let’s say you selected the article content type. After that, a list of fields will appear from where you can select the one required to translate.
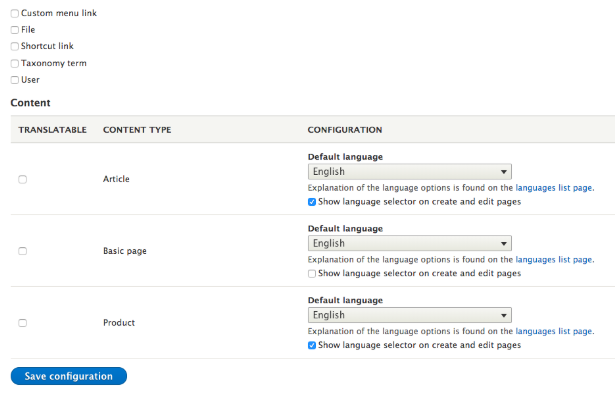
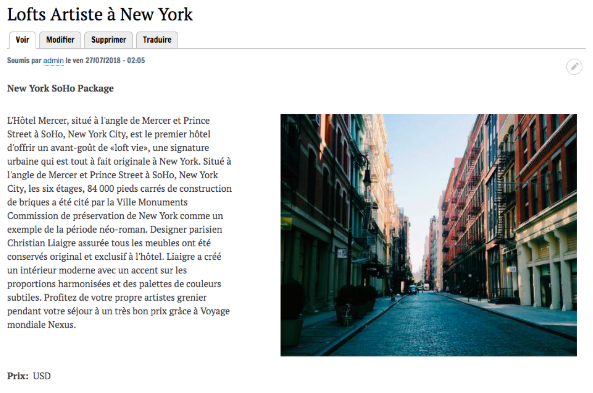
Make the field inside content multilingual.Now we have an example of how to translate a node into the French language.
Go to /admin/content and search the particular node and in then from the operation column select translate from the drop down.
It is here that the translation page appears:
1. Note that the user interface has switched to French. To switch it back to English, remove the first instance of fr in the browser’s URL.
2. For example, if your URL looks like example.com/node/5/fr/node/1/edit, remove the fr that comes after example.com.3. Then add the translation according to your requirement.
4. You have to translate your content into the required language by yourself. After translating your content save the node.
-
Config Translation
It provides a translation interface for configuration and translates everything which was not translated before.
Enable the module. To translate the site information locate that configurations in your site.
Find the tab or link with label translate option. Add translation according to your requirement and save it.
To translate the site information follow the steps:
1. Go to the basic site settings. Click on the translation information tab.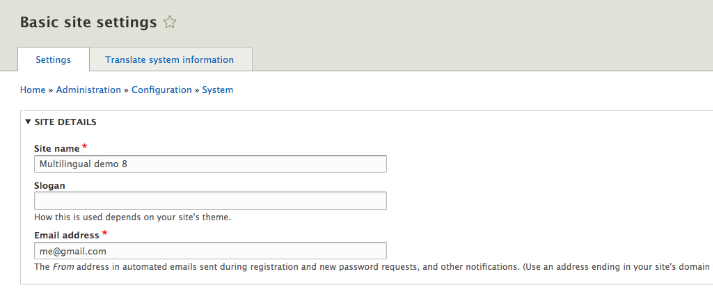
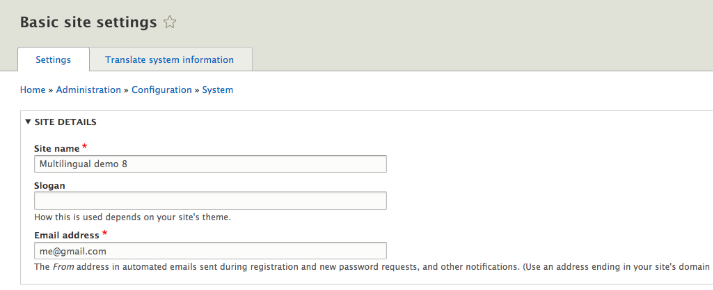
2. Select the desired language which you have to translate and save it
Having a multilingual site is easy in Drupal. Here are some benefits for Drupal 8 multilingual site.
Language handling
- Natively install in 94 languages
- Simplified language configuration
- Two special languages instead of one (Not specified/Not applicable)
- Assign a language to everything (content and configuration alike, eg. pages, views, menus, etc.)
- English may be deleted
- Blocks may be language dependent and more page elements are blocks
- Better language selection defaults (URL negotiation enabled by default)
- Browser language detection made configurable with external language codes
- Newly configurable fallback selected language
- Admin interface language selection option per user
- Transliteration built-in for machine names

Interface translation
- Automated downloads and updates
- One central directory that may be deployed
- Batched imports for optimal memory handling
- Built-in translation UI revamped for easier editing
- Plural version editable on an integrated interface
- Protected custom translations, exportable
- English text customizable
- Default shipped configuration is translated
Content translation
- Flexible language defaults configuration
- Freely position or hide the language selector
- Field-level translation configurability
- Optionally share an image between translations on image fields
- Applies to all types of content (taxonomy, user fields, products, rules, etc)
- Views integrated with flexible filtering and display options
- Integrated fully with core search as separate results
- Exposed language information via search API
- Per-language content access
Configuration management
- All configuration is translatable (roles, text formats, blocks, views, panels, etc.)
- Built-in responsive translation interface
- Overview screen for translators, contextual translation tabs for site builders
- All shipped config pre-translatable on localize.drupal.org
We specialize in Drupal development. Connect with us at [email protected] to build awesome web development services.
Subscribe
Related Blogs
Inside the Drupal AI Summit: Themes, Speaker and What To Expect

“ The web is changing fast, and AI is rewriting the rules. It writes content, builds pages, and answers questions directly,…
FOST and Drupal AI Initiative: Next Era of Responsible AI

Three years after the launch of generative AI tools marked a new age for artificial intelligence, almost 90% of survey…
Drupal AI Ecosystem Part 5: AI Content Suggestions
Drupal has steadily evolved from being just a content management system into a flexible platform that incorporates emerging…


