7 Quick Steps to Create API Documentation Using Postman
If you work with API, you are likely already familiar with Postman, the beloved REST Client trusted by countless developers. However, beyond its renowned testing capabilities, it also holds a secret superpower that often goes unnoticed. You can use the platform to effortlessly transform your API into beautifully formatted documentation.
In other words, with Postman, you can not only test, document, and share APIs but also create user-friendly and interactive documentation that will make developers' lives easier. No more spending countless hours manually documenting your APIs—Postman generates documentation from the requests you've already created.
If you are wondering how exactly you can use postman to facilitate your API documentation, this blog is for you.
What is API Documentation in Postman?
Postman allows developers to test, document, and share APIs. It provides a powerful interface for creating and executing HTTP requests, as well as tools for testing and debugging APIs.
Postman's documentation feature allows you to create user-friendly and interactive documentation for your APIs, making it easy for other developers to understand how to use your APIs. The documentation is generated from the requests that you've created in Postman, so you don't need to make any additional documentation manually.
Why is API Documentation important?
Documentation forms the essential foundation for the success of any technology, enabling end-users to unlock its full value and potential.
At a glance, here are the core reasons why API documentation is important for you:
- Boosts API adoption and enables effective execution of the API
- Enhances the experience of API users
- Provides exhaustive information about API functionality, usage, integration techniques, and updates
- Facilitates a thorough understanding of API's technical intricacies and integration guidelines
Can you employ an API in the absence of documentation? Certainly, it is technically feasible. However, the true comprehension of the API's technical intricacies and integration guidelines is achieved far more effectively when accompanied by thorough and precise documentation.
Now let us look at its execution.
7 Steps to create API documentation using Postman
In Postman, you can create a new API request by clicking on the "Add Request" button in the top left-hand corner of the app.
Here is how you can generate documentation for your APIs using Postman:
Step 1: Create a Collection
The first step is to create a collection in Postman. A collection is a container that holds all the API endpoints, requests, and documentation.
To create a new collection, click on the "New" button in the top-left corner of the Postman window and select "Collection."
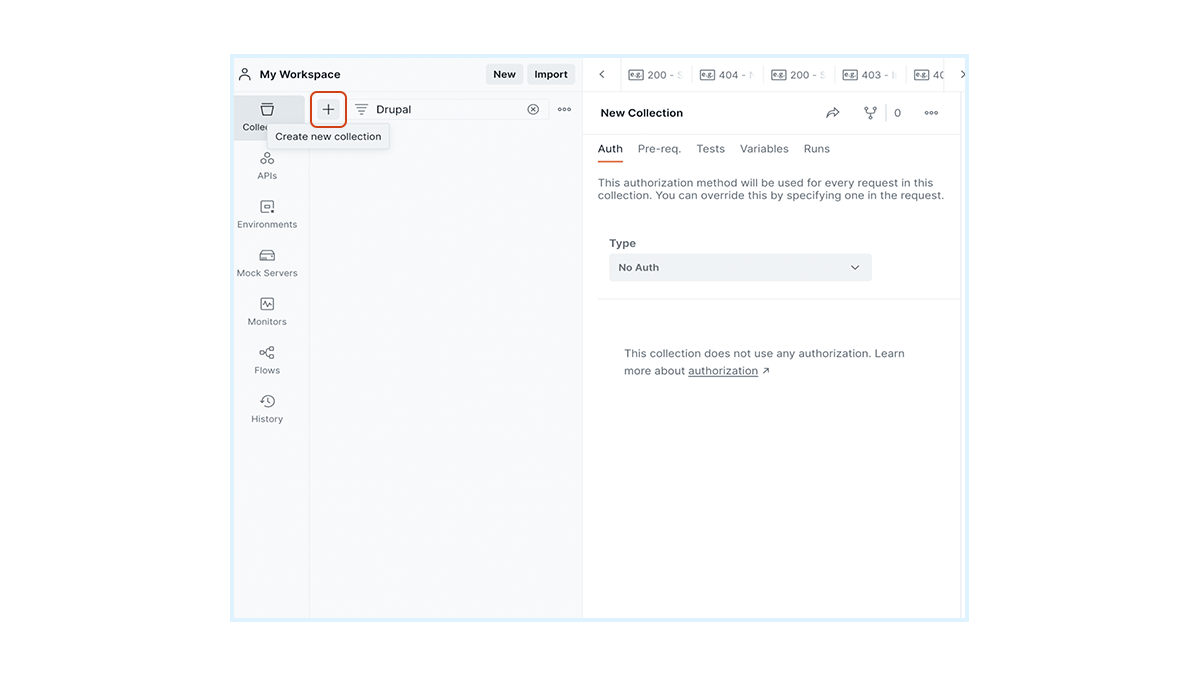
Step 2: Add Requests to the Collection
Once you have created a collection, you can start adding API requests to it.
To add a request, click on the collection where you want to add the request and click the "Add Request" button. Enter the request details such as the request URL, HTTP method (GET, POST, PUT, DELETE, etc.), headers, and parameters.
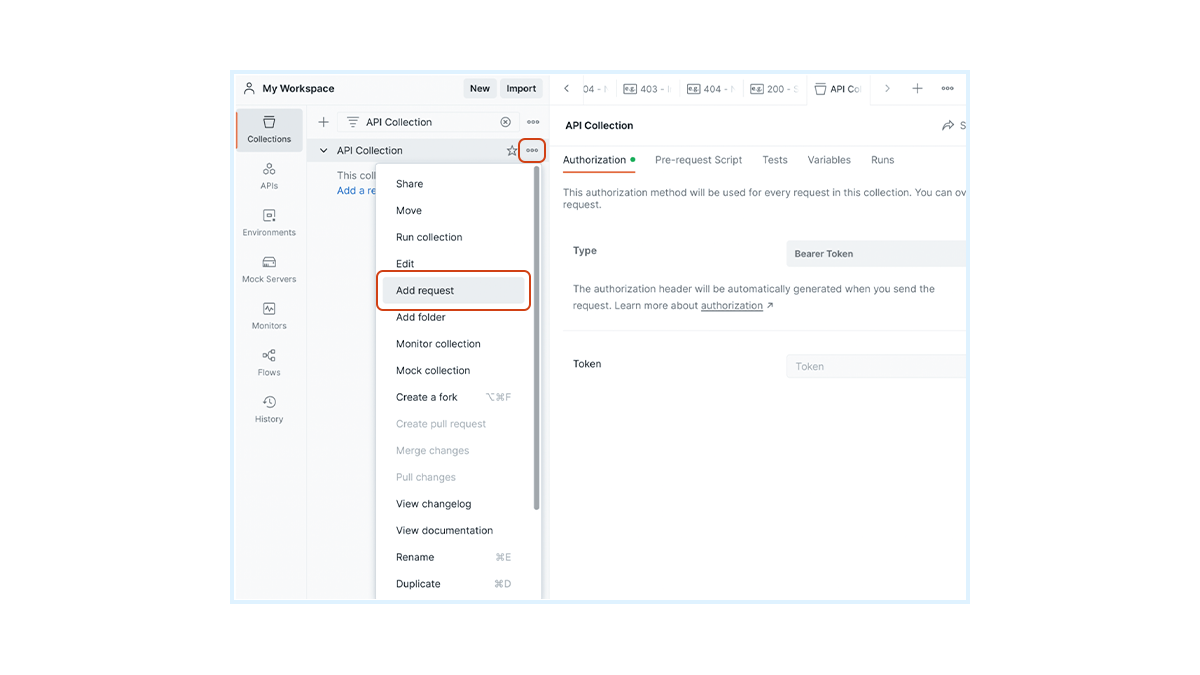
Step 3: Add Description and Examples
To provide meaningful documentation, add descriptions and examples to each request.
You can do this by clicking on the request, navigating to the "Description" tab, and entering relevant information. Describe the purpose of the request, explain any required parameters, and provide examples of request payloads and responses.
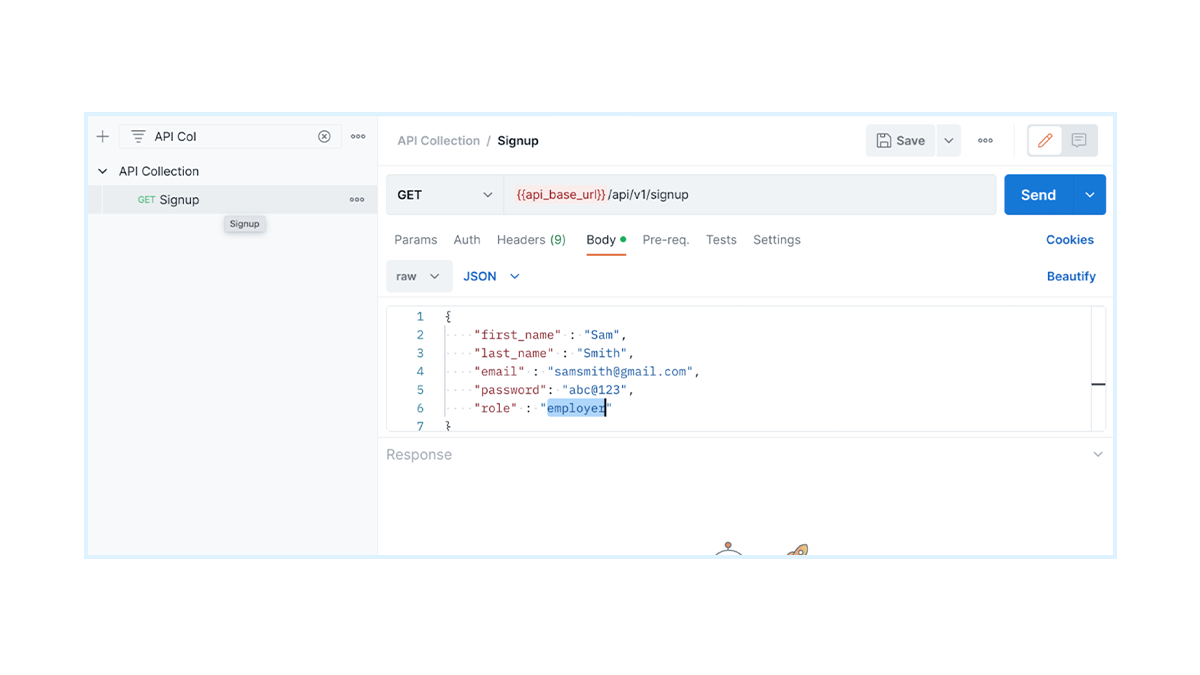
After running your API, save the response for documentation.
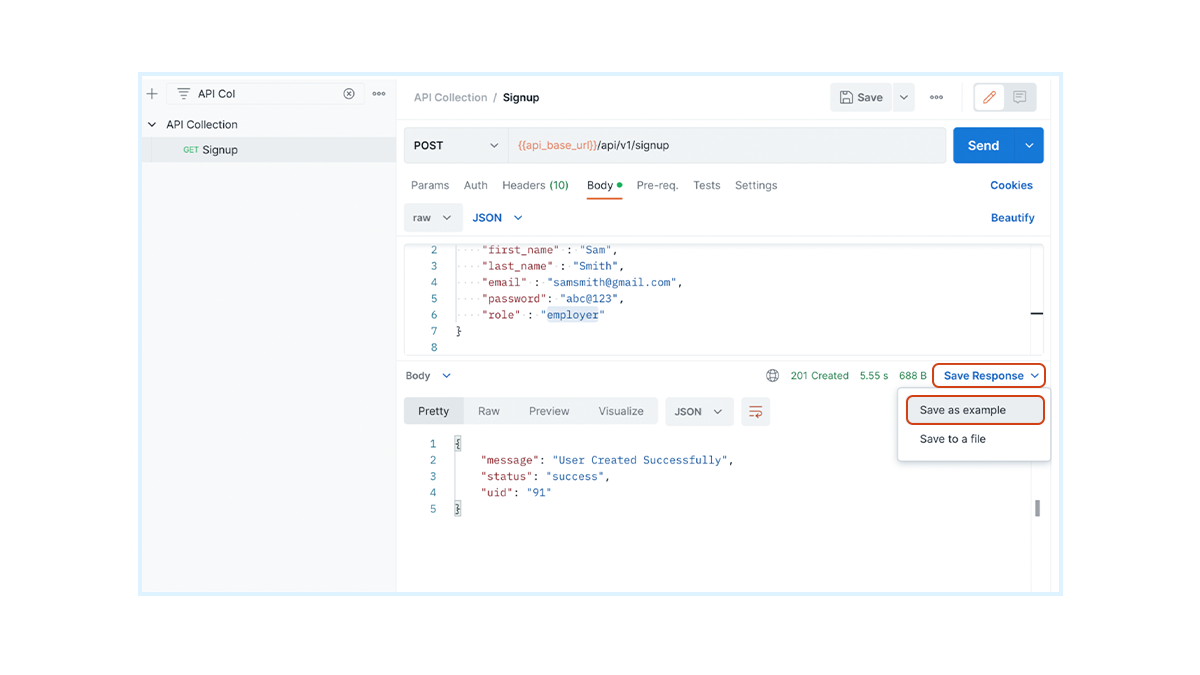
Rename API responses with a status code.
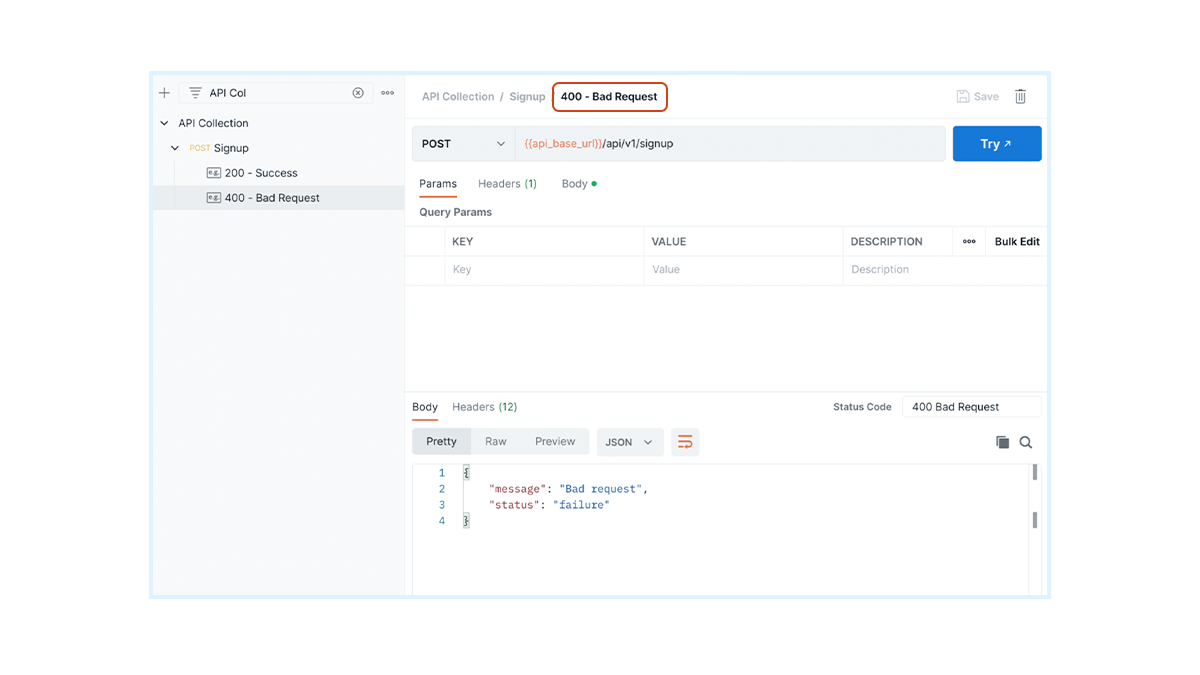
Step 4: Generate documentation
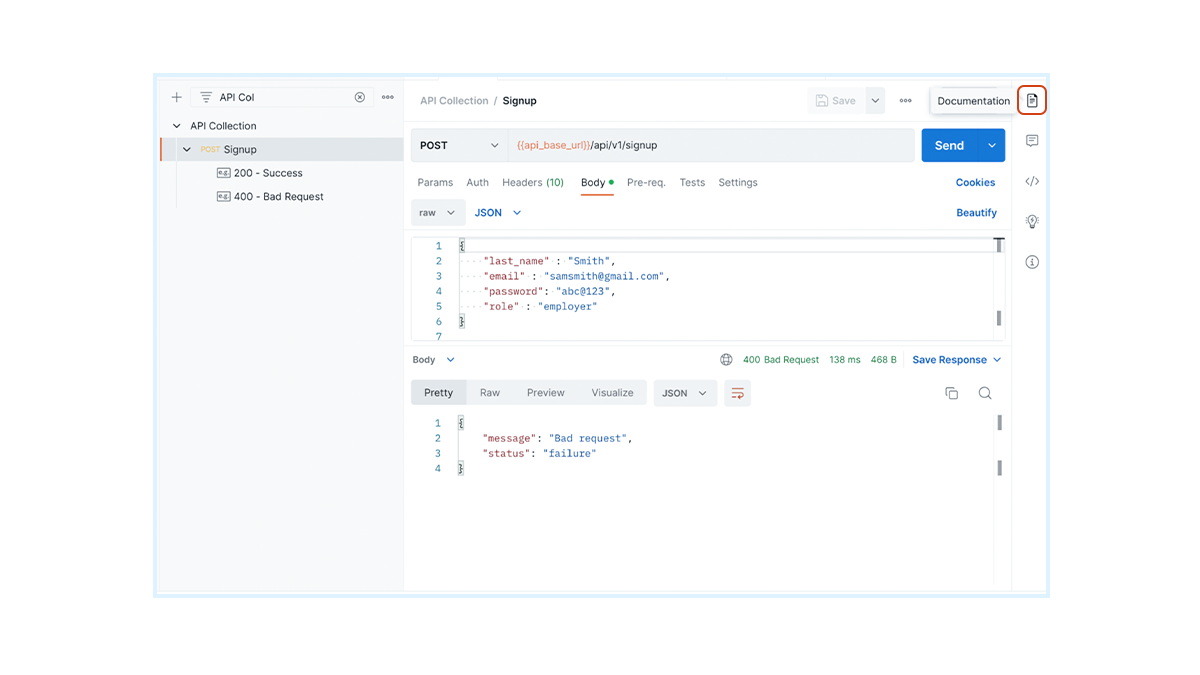
Once you have added all the requests and organised your collection, now you can generate the documentation.
To do this, click on the Documentation icon as shown in the below screenshot. This opens the documentation in the right sidebar for your collection.
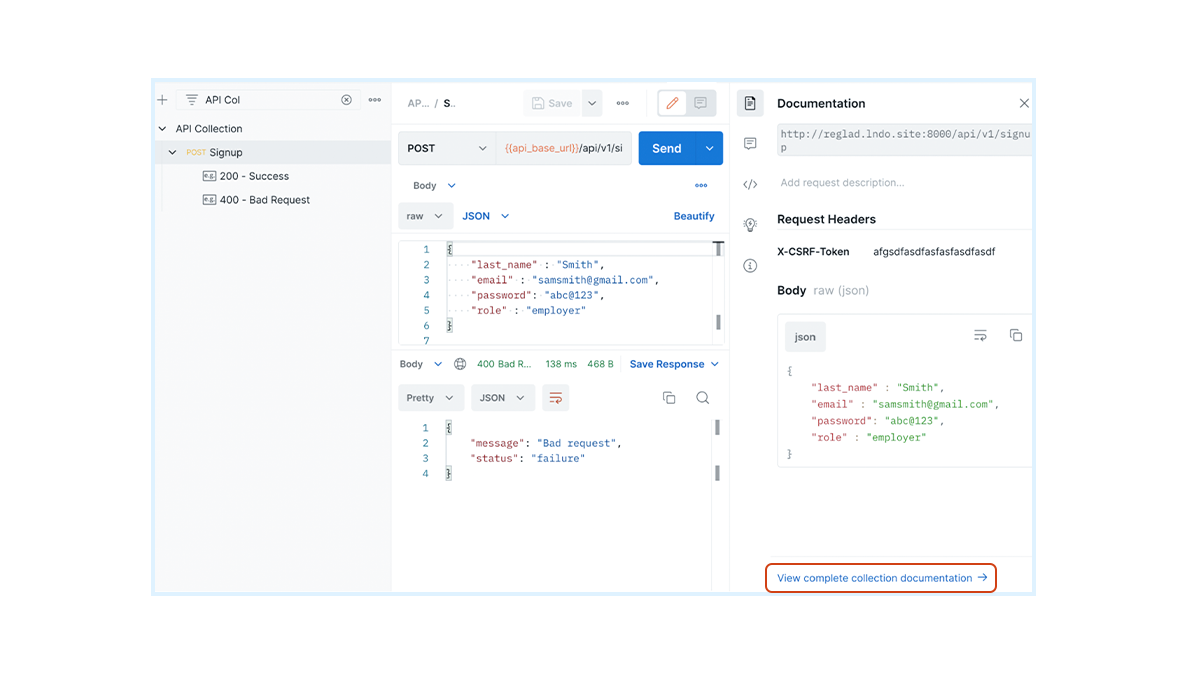
After modifying documentation details, click on the “View complete collection documentation” button. This opens the Postman web view for your collection.
Step 5: Customise Documentation
In the Postman web view, you can customise the appearance and layout of your API documentation.
Add a title, description, and logo to give it a professional look. You can also rearrange the order of requests, include additional information, and add custom styling.
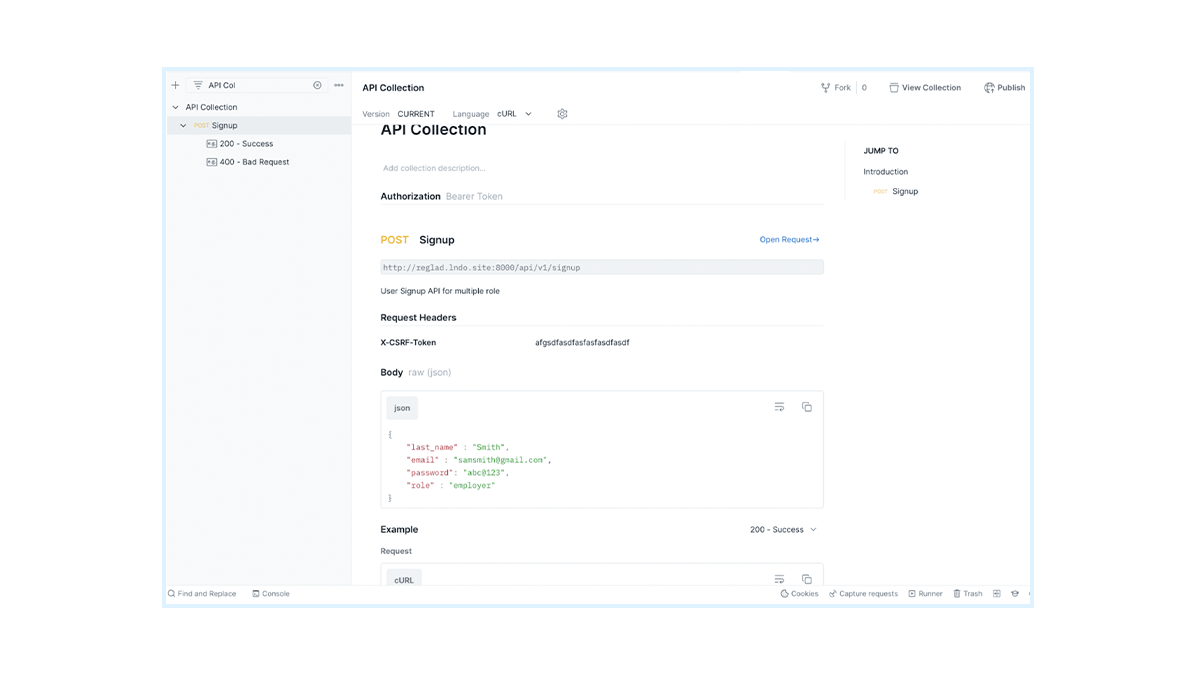
Step 6: Share and Publish Documentation
After customising your documentation, you can share it with others.
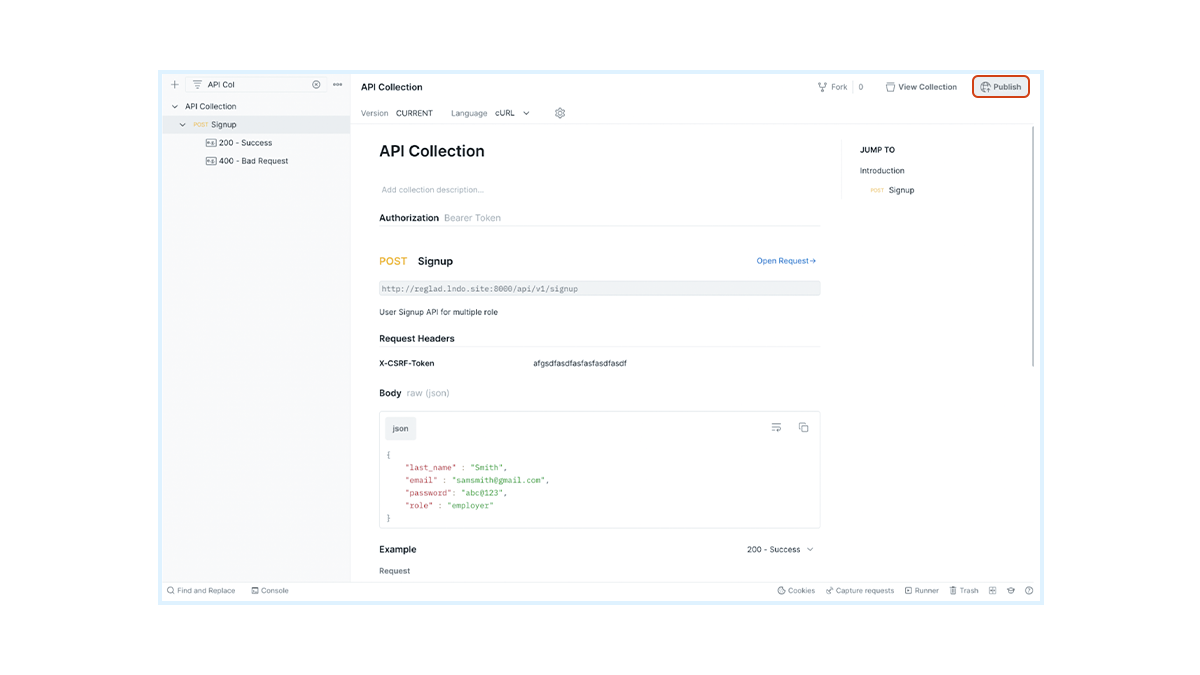
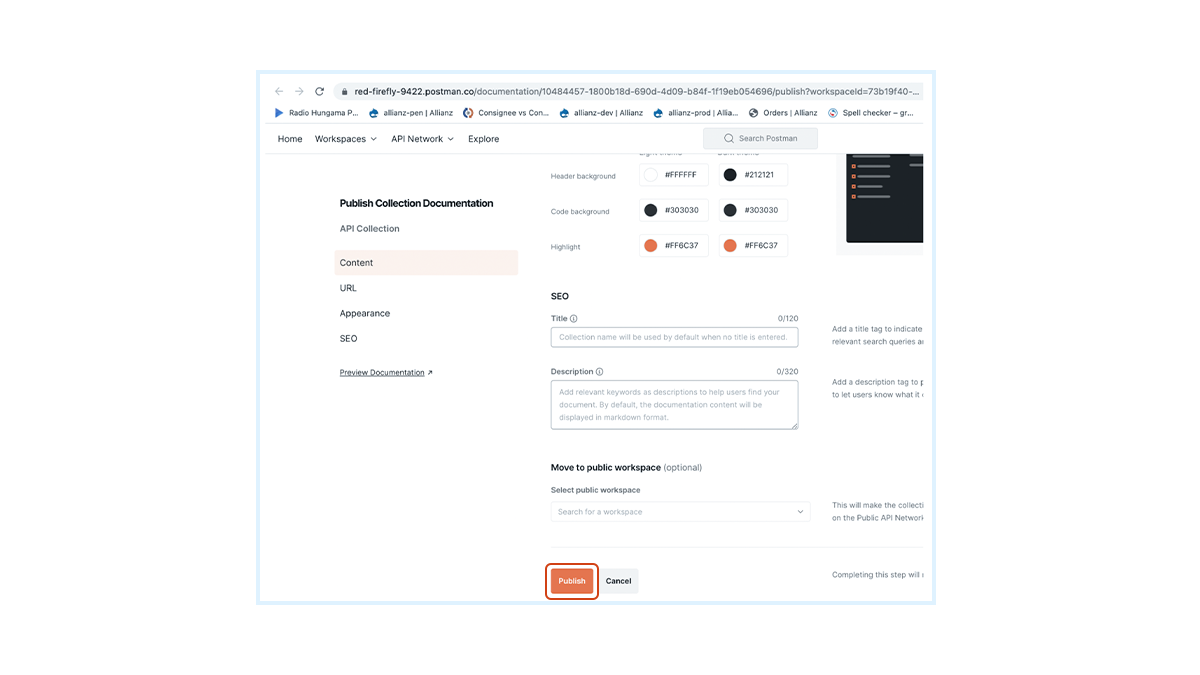
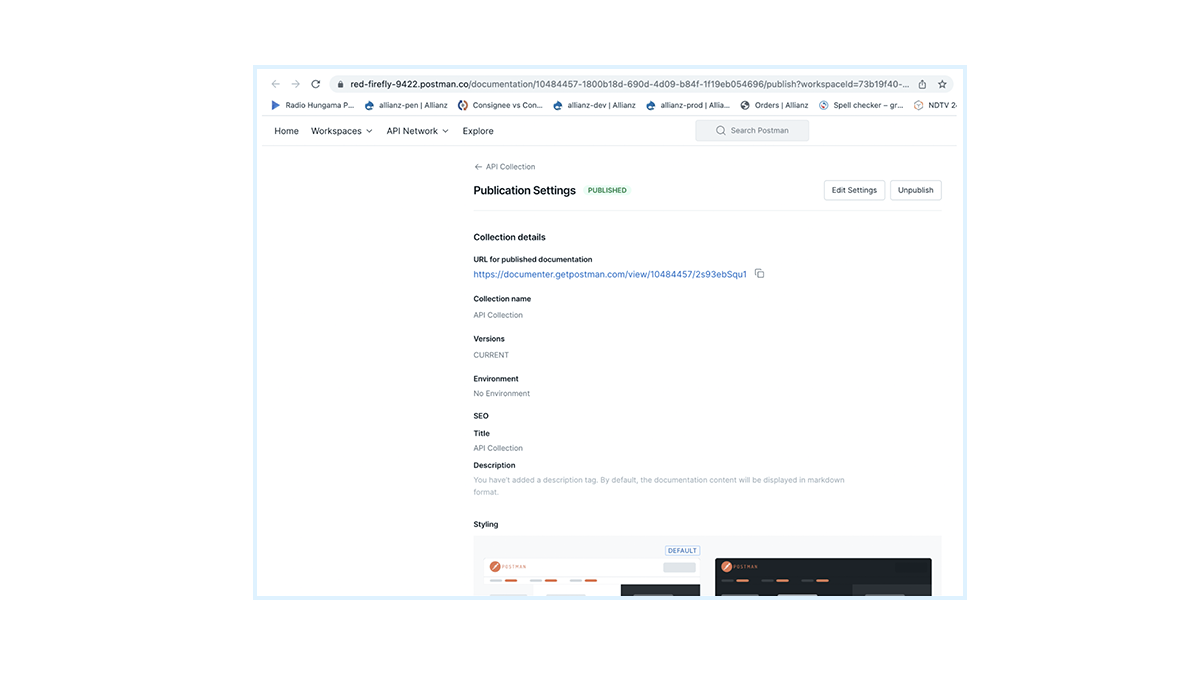
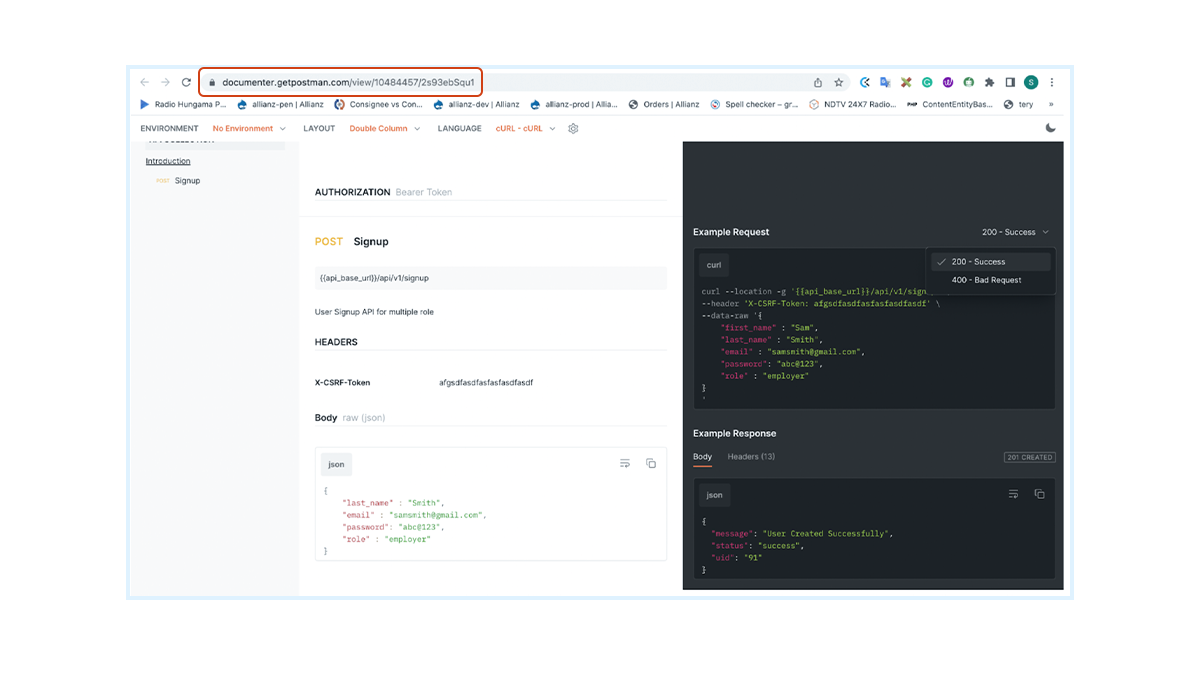
Click on the "Publish" button in the top-right corner of the Postman web view to generate a public or private link to your documentation. You can also choose to publish it on the Postman public API network for broader visibility.
 Step 7: Update and Maintain Documentation
All said and done, remember API documentation needs to be updated regularly for it to make your life easier.
As you make changes to your API or add new features, remember to update the corresponding documentation in Postman. Changes made in Postman will be automatically synchronized, ensuring everyone has access to the latest version.
Voila! With the power of Postman at your fingertips, you can transform your APIs into a streamlined and efficient directory.
Wrap-up
You can follow the step-by-step guide provided in this blog to create user-friendly and interactive documentation for your APIs. Thus, enabling seamless collaboration and understanding among developers in Postman. I recommend setting aside some time in your day to keep your API documentation up to date for a smoother developer experience.
Subscribe
Related Blogs
Trek n Tech Annual Retreat 2025: A 7-Day Workcation of OSL

OSL family came together for the Trek n Tech Annual Retreat 2025, a 7-day workcation set amidst the serene beauty of…
Exploring Drupal's Single Directory Components: A Game-Changer for Developers
Web development thrives on efficiency and organisation, and Drupal, our favourite CMS, is here to amp that up with its…
What is Product Engineering Life Cycle?

Imagine constructing a house without a blueprint or a set of plans. It will be challenging to estimate the cost and labor…


