Want your users to keep coming back to your website? One of the ways could be by allowing them to bookmark their favorite article on your website. This can be achieved through Drupal flag module.
Drupal Flag module is a flexible flagging system used to provide a number of flags for various entity types like node, comment, and users. The site administrator can provide any number of flags. Other possibilities include - bookmarking the content/pages or marking offensive.
Flags may be used per-user, meaning that each user can mark an item individually, or global, meaning that the item is either marked or it is not marked, and any user who changes that changes it for everyone.
In this article, let us explore how to use the flag module for your Drupal website.
Module Integration
- Install the Flag Module using composer (to save time). Run the following command:
composer require 'drupal/flag:4.x-dev'
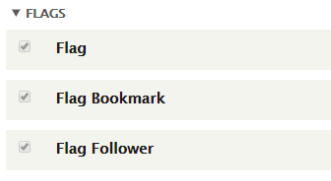
- Enable the module along with its submodule. Go to extend, search the modules and enable them.
Configuring the Flag Module
After successful installation, let’s configure the Flag module to see the scope and possibilities of the module.
-
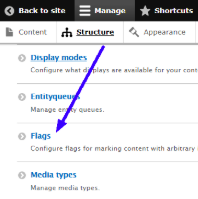
Navigate to ‘Structure’ → Click on ‘Flags’ → Configure settings in the Views administration section later.
-
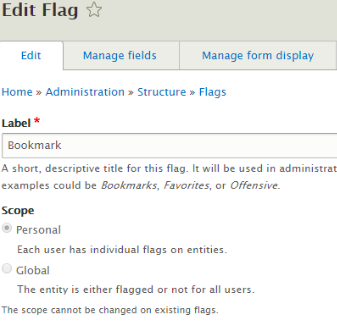
Click on ‘Edit’ and edit the Bookmark Flag.
Editing the Bookmark Flag
-
On the Edit Flag page, the label is set as Bookmark by default.
You can choose the scope as the global flag. This means every node has a published status. In case one of the users publishes or unpublished the note it's viewable that way for all users’ on a global level otherwise it happens on an individual level.
Messages
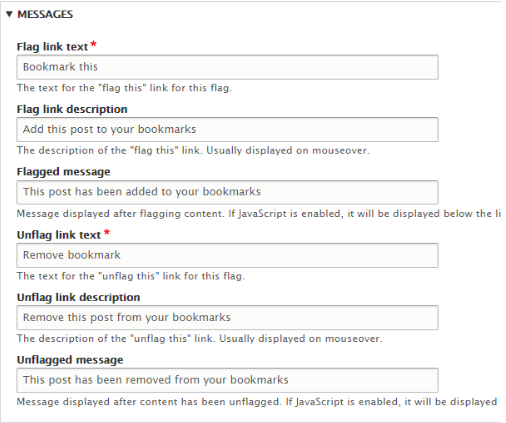
- Add a message as text input that will be shown when the content/node is flagged. Add the messages in the required fields.
- Flag link text: Text link for the bookmarked flag.
- Flag link description: The description of the link shown when hovering over the content.
- Flagged message: Message displayed after bookmarking the content.
- Unflag link text: The text link for removing the bookmarked flag.
- Unflag link description: The description of the link on hover.
- Unflagged message: Message displayed after removing the bookmark from the content.
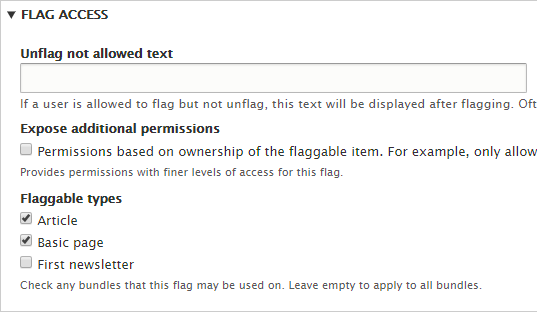
Flag access
You can define the ‘unflag not allowed' text and expose additional permission based on the ownership of data. Add your message if you select this option.
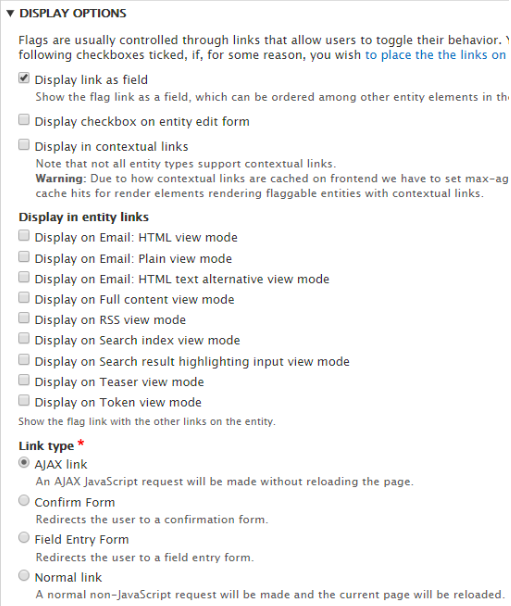
Display Options
- Flags are usually controlled through links. You can choose how your users interact with flags and display the bookmarks by changing options and fields. Fill in the required fields.
- Display link as the field: If this is selected, flag link will be shown as field, which can be ordered among other entity elements in the "Manage display" settings for the entity type.
- Display checkbox on entity edit form: A checkbox will appear on the bookmark edit form.
- Display in contextual links: Note that not all entity types support contextual links.
- Display in entity links: Show the flag link with the other links on the entity.
-
When the modifications have been done click on - Save Flag.
Showing Bookmark
-
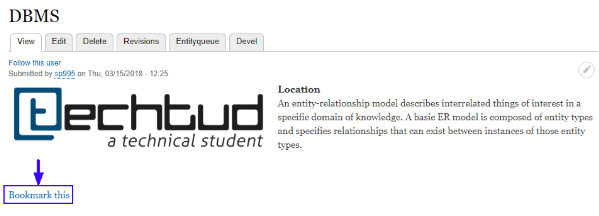
Go to the homepage and look into one test article. You will see a bookmark link below the article. If you click this link, the article will be bookmarked.
Link Type
-
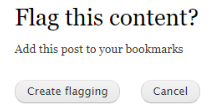
Confirm Form: Instead of choosing Ajax link type, you change the link type to confirm form. After clicking the link a confirmation will be redirected to the user to creata e flag. There is also a cancel button to cancel the flagging.
-
Modify the text messages for the Confirm Form link type or use the default one.
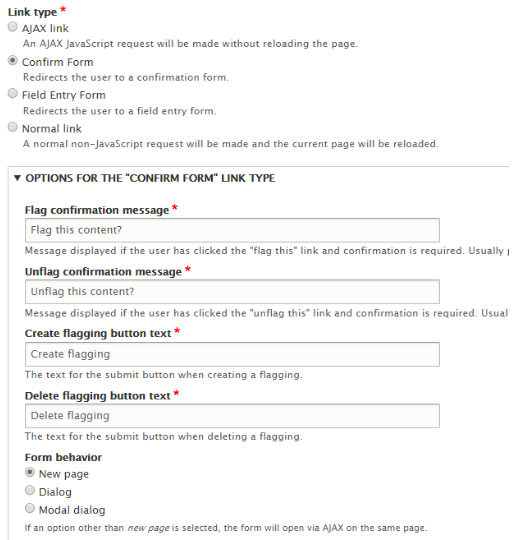
-
Field Entry Form: You can even change the link type to Field Entry Form. It works almost the same as but, with an extra functionality of Edit and Update.
-
Enter the text for different fields as per your requirement.
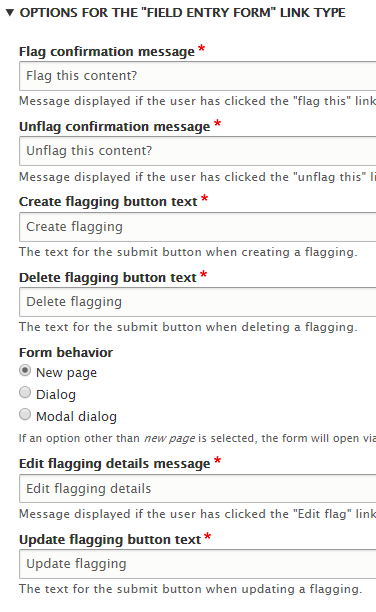
-
There are different form behaviors to choose from. If an option other than the new page is selected, the form will open via AJAX on the same page with a dialog box.
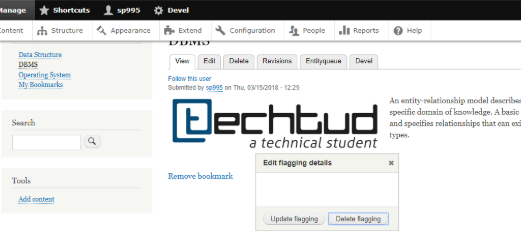
-
Normal link: Most basic Link type. In the normal link, a non-JavaScript request will be made and the current page will be reloaded.
Showing saved Bookmarks
- To check the bookmarks, go to ‘Sidebar first’ block and click on ‘My Bookmarks’.
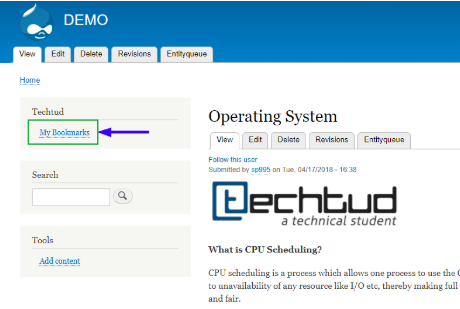
The cool thing to note is, this whole thing is a view, so what means if you don't like a column or want to add a column, just go ahead and edit the view.
Cheers! Bookmark functionality is successfully added to your Drupal site. Let me know what did you use the flag module for.
Subscribe
Related Blogs
Inside the Drupal AI Summit: Themes, Speaker and What To Expect

“ The web is changing fast, and AI is rewriting the rules. It writes content, builds pages, and answers questions directly,…
FOST and Drupal AI Initiative: Next Era of Responsible AI

Three years after the launch of generative AI tools marked a new age for artificial intelligence, almost 90% of survey…
Drupal AI Ecosystem Part 5: AI Content Suggestions

Drupal has steadily evolved from being just a content management system into a flexible platform that incorporates emerging…


