Not a single day passes by when we don't search for something on our web browser. Both as a developer and users I can’t imagine a better alternative than Apache Solr.
Solr is a highly reliable, scalable and fault tolerant search application that provides distributed indexing, replication, and load-balanced querying with a centralized configuration.
If you are looking for a super-fast, accurate and awesome search application then Apache Solr is the right solution for you.
"Solr is a popular, blazing-fast, open source enterprise search platform".
In Drupal, Solr is used to get more accuracy within less time. Solr is an open source Java-based API built on Lucene (full-text search engine).
Features of Apache Solr:
- Full-text Search
- Faceted navigation
- Related search or Recommendation
- Spell Suggest or Auto-Complete
- Custom document ranking
- Snippet generation or highlights and more
CMS, E-commerce sites, blogs, platforms like Netflix even Instagram and Twitter use Solr for a faster search.
But Drupal provides core search functionality, why should you use Solr, then?
Open source Solr provides many capabilities over Drupal core search, like:
- Greater control over website search
- Caching, Replication, Distributed search
- Faster indexing/search where indexes can be Merged or optimized
- Great admin interface can be used over HTTP
Implementing Solr in Drupal 8
The process is divided into the following parts:
- Install the Drupal Solr Module
- Install Apache Solr
- Configure the module with Apache Solr
- Set up the search index
- Create a search page
Installing the Solr module in Drupal 8
Drupal provides the Search API Solr Search module which integrates Drupal with the Apache Solr search platform in the backend supporting faceted and multi-index searches. Although there are a number of other Solr modules available too, most of them are not compatible with Drupal 8.
A module can be installed using various methods, and here we will install it using Composer. Just run the following command:
'drupal/search_api_solr'
Once, it is done. Enable the module.
Go to Extend → Search Search API Solr Search → Enable it
Install and run Apache Solr on your server
The installation process is different for every runtime environment.
To install Solr server, we need Java Runtime Environment as Solr is purely written in Java (Lucene). You can check your current Java version using the following command: “java –version”
Download the latest version for Apache Solr from the official website.
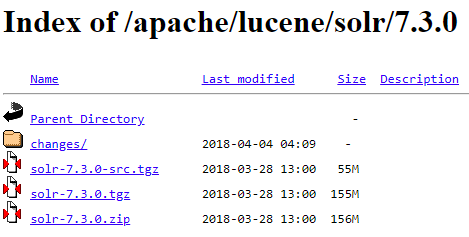
Here, I am using Windows, and I have uncompressed the downloaded .zip file. Put the folder in your local directory. In my case, it is Xampp/htdocs.
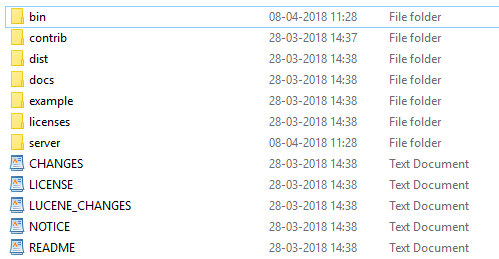
There are a number of folders in the solar directory among which bin is the most important to start with Solr.
- Go to CMD and type the following commands:
C:\Users\Souravpal>cd C:Xampp\ htdocs\solr
C:\Xampp\ htdocs\solr>cd bin
C:\Xampp\ htdocs\solr\bin>solr start
Waiting up to 30 to see Solr running on port 8983
Started Solr server on port 8983. Happy searching!
Solr runs on the default port on 8983. You can change the port if you want.
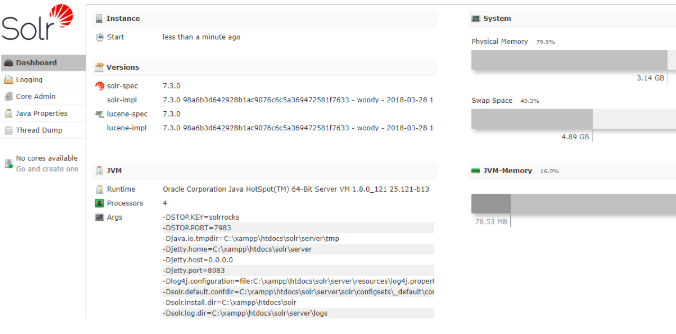
Solr is now successfully installed on your local machine. To check Solr type – localhost:8983 – in your browser and hit enter. Solr comes with an admin UI interface.
Configure the Module with Apache Solr
In this section, we will create a Solr server for our Drupal 8 website.
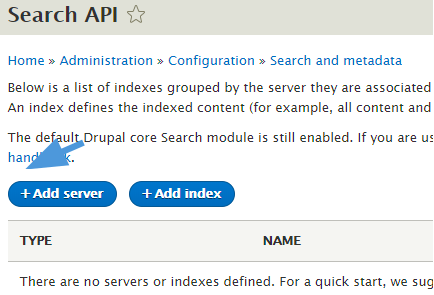
Go to Configuration → Search And Metadata → Search API → Click on Add server.
- Server name: Name your server. Let’s name it Solr Search.
- Enable the server: Only the enabled servers can index items or execute searches.
- Add server description: Give a brief description. Although this is optional.
- Backend: Default chosen as Solr (Index items using an Apache Solr search server).
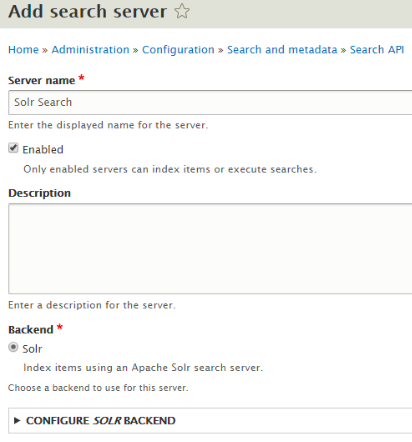
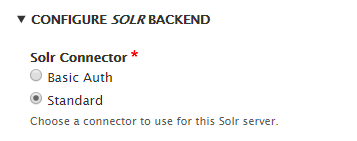
Next, Configure your Solr Backend. Expand the menu and modify it according to your needs.
- Solr Connector: Two connectors are there – Basic Auth and Standard. You must select a connector to use for this Solr server. I am taking Standard.
- HTTP protocol: You can select https if your server uses SSL. I will use the Http.
- Solr host: localhost (you have to enter the IP or hostname for that machine if your Solr Server is on a different machine,)
- Solr port: 8983 (Default port)
- Solr path: /Solr (The path to locate server).
- Solr core: Give a name to identify Solr (optional).
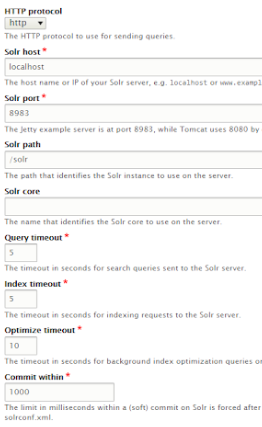
The values as defined default work fine. However, you can also change them accordingly.
Connector Workarounds
- Solr version override: By default, it is automatically select Solr version but if you wish then you can specify the version from the drop-down.
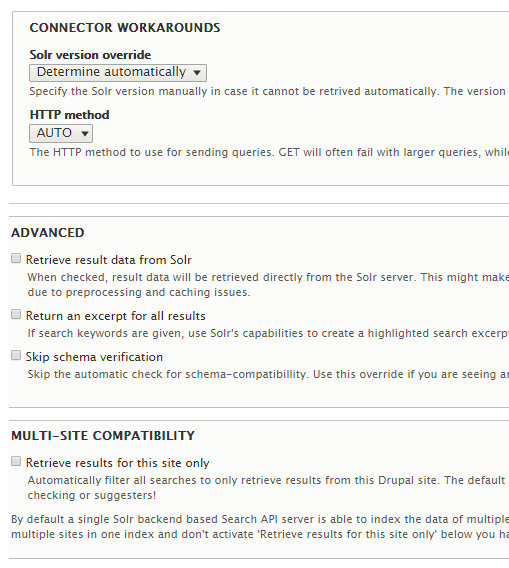
- HTTP method: Recommended to be set as Auto.
Keep the advanced settings un-checked and click on save.
Next, we need to set up is the search index. A search index determines what should be indexed and searchable.
Set up the Search Index
Here you will learn how to use Search API index that will index nodes and define the fields should be displayed.
Go to Configuration → Search and Metadata → Search API → click on Add index.

- Index name: Enter an index name, as you want.
You can create multiple indexes and have them index different types of entities like comments and users.
- Data Source: There are few entries for indexing and searching. Check them to enable for your indexing. One or more data sources of items will be selected to store the index (mandatory). Do practice with each of the entries to explore them well. Now, configure the data source entries selected. Let’s take a look for content data source below:

- Configure the Default Tracker: The default tracker uses a single database table for tracking the item.
- Indexing order: Order of item for indexing. Select a relevant ordering for indexing.
- Server: Select a server to use indexing. For this case, select Solr Search.
- Enabled: This enables this index but the selected server should also be enabled, then only this will work.
- Description: You may enter a short description for your indexing (Optional).
Index Option
- Read-only: You can only be allowed to read the indexed data but you can’t modify it from the server.
- Index items immediately: New item are indexed and updated immediately. If you are indexing a large number of items, you may want to leave this disabled and save timeouts.
I'll enable it so that everything is indexed immediately without having to run Cron every time.
- Select the cron batch size: This is the number of items to be indexed for each Corn run. Larger the number, the higher the resource will be consumed.
- After configuring the settings, click on save and add the field.
This leads to the Add Field page, where you can add different fields as per the usage for your website. Do practice with each of the fields and explore them. You can add them to add Fields section also.
After successfully creating an index, now we need to add fields.
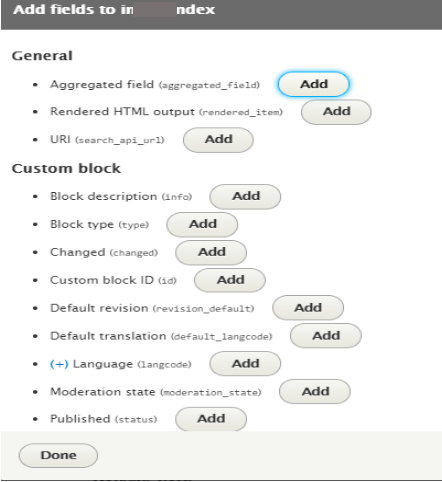
Adding Fields to index
- Go back to Search API and Edit the Index that you have created.
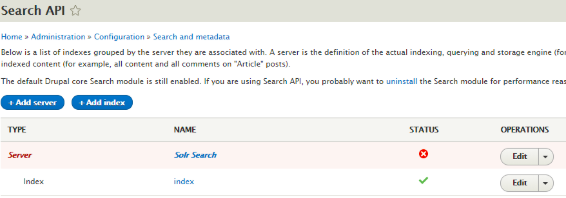
- There you can see Fields tab in manage fields for search index Solr index.
We have added a few fields before. You can add more fields by just clicking on Add Fields button, chose fields, and then click on Add. - Don’t forget to click on save changes.
“Processor” Configuration
- Processors: Processors configure data at index and search time. Solr server already has built-in pre and post-process data.
Processor Order:
You can even change the order for the pre-processor index, pre-processor query, post-process query.
- Processor settings: If you want to modify the support fields, then that can be done in this setting.
You are supposed to enable all supported fields by just clicking ‘Enable on all supported fields’ or some particular blocks for your searching and indexing by. Click on Save to save the Configuration.
Cheers!! We've successfully created a list of indexed items.
Create a Search Page:
The last thing we need to create is search pages using the Search API module for creating simple, fast, customized search pages.
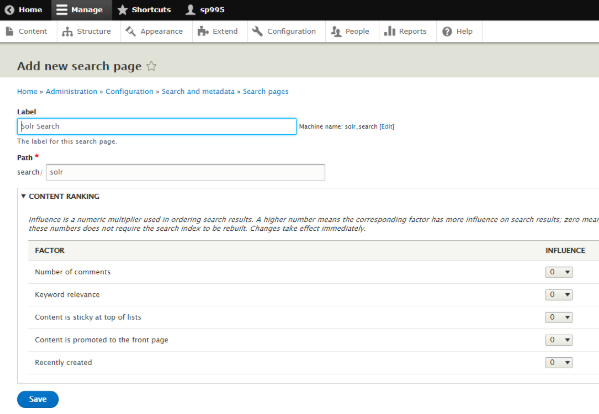
- Go to configuration → Search and metadata → Search pages → Select page type → add search Page.

- From search page type choose a page type. I will choose content and then click on Add search page. This will lead to Add new Search page where you can put Label and path for the search page. You can change the influence in the content ranking. Influence is a numeric used in ordering search results. Next click on Save.
- Once you’re back on the “Search pages” page, you can see your newly created search page. You can reorder the pages to be displayed. You can even set a page as default by just editing that page.
- Indexing Progress: Make sure a few % items must be indexed. Only items in the index will appear in search results.
- Indexing Throttle: Number of items to index per cron run. Set a number from the drop-down.
- Logging: You can set a logged search by just checking log searches.
After all, has been done, click on ‘Save configuration’
Now, Get to the search URL(for my case search/Solr) and test your newly created Apache Solr Search Block.
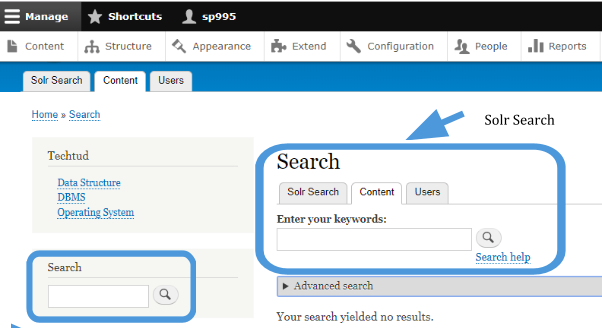
You can change the permission for search (Administer search/Use advanced search/Use search) and configure the Solr search block. Disable the core block and replace it with Solr search.
Conclusion
That’s it! You’ve successfully integrated Apache Solr Search Module in the Drupal site. I hope this helped you in identifying the possibilities behind Apache Solr and how to use it.
Drop us a line at [email protected] for more such tutorials!
Subscribe
Related Blogs
Drupal's Role as an MCP Server: A Practical Guide for Developers

"The MCP provides a universal open standard that allows AI models to access real-world data sources securely without custom…
What’s New in Drupal CMS 2.0: A Complete Overview
"Drupal CMS 2.0 marks a significant change in the construction of Drupal websites, integrating visual site building, AI…
Drupal AI Ecosystem Part 6: ECA Module & Its Integration with AI

Modern Drupal sites demand automation, consistency, and predictable workflows. With Drupal’s ECA module, these capabilities…


