Are you a robot? Prove that you are a human.
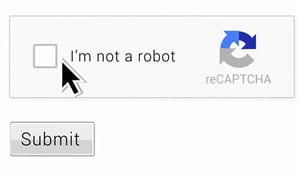
We all have come across this image when browsing the internet. More often when trying to submit forms. The Captcha was developed to prevent automated spam bots from carrying out tasks on the internet. In more simple terms, it is a security measure to prevent bots from overloading servers with unnecessary traffic.
The Internet is overloaded with humans and including robots in this race slows the overloading. Captcha is a way to prevent robots to access the certain parts of the web, something like the image above.
Users are required to type words, identify objects, do simple maths all in order to prove their identity (read human identity).
This was from a user’ perspective but when developing a website it is important to include Captcha in order to protect the servers against bots. Evil Bots can lead to overloading of servers and eventually their failure to operate efficiently.
In Drupal, we can implement such checks using CAPTCHA, reCAPTCHA, CAPTCHA Pack, Text CAPTCHA, Egglue Semantic CAPTCHA, Captcha Riddler, Hidden CAPTCHA, CAPTCHA after, KeyCAPTCHA, Draggable CAPTCHA, Image CAPTCHA refresh, No captcha Recaptcha.
In this article, we are going to walk along with reCAPTCHA and see how to implement it and the advantages this modules carries.
reCAPTCHA is dependent on the CAPTCHA module (module has a pre-release version for Drupal 8) which implies that the latter is also required for the proper functioning of the reCAPTCHA module.
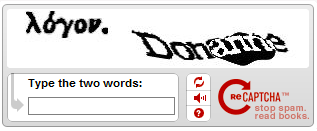
Until 2014, reCAPTCHA module used to consist of two words where one was randomly generated and the other was part of a project carried out for digitization of old books. The current implementation consists of a simple click on a checkbox or identification of images.
Setting Up the CAPTCHA in your Drupal 8 Website
- Install Captcha and reCaptcha module. Check the installation guide.
Go to Configuration/ People/ Captcha Module Settings.
- From the Default Challenge Type drop-down menu, select reCAPTCHA. We can leave the other options at their default state and scroll down.
The Challenge Description field is used to display any custom text that an administrator wishes to display instead of the default text.
- Next, we click on the save configuration button.
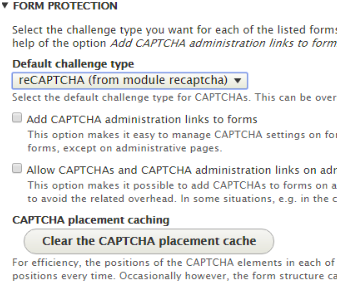
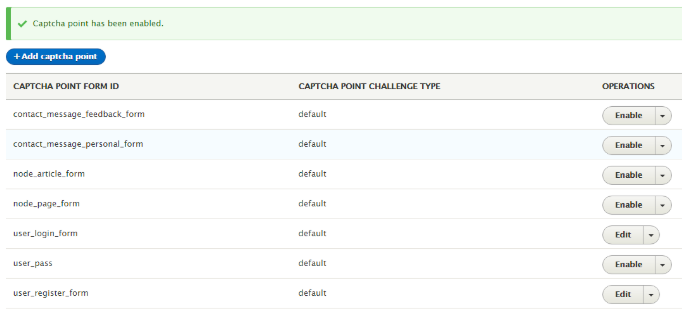
- After our configuration is saved, we navigate to CAPTCHA Points by clicking on the respective tabs located at the top of the window.
- In this menu, we can customize where we want our checks to appear by clicking on the enable button below the operations section. Enabling checks in the required forms.
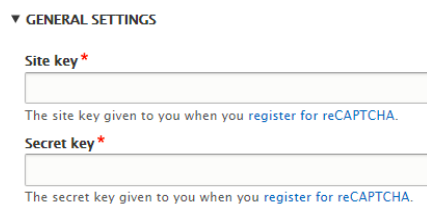
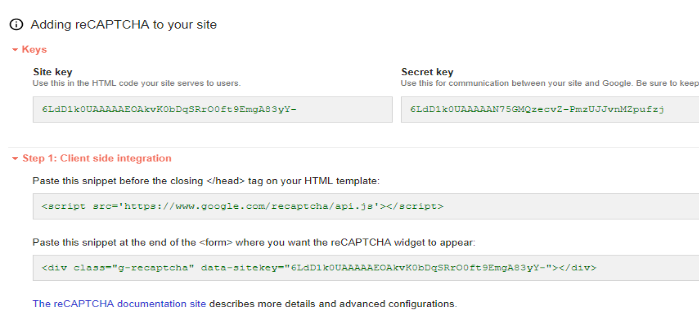
- Now, navigate to the final tab i.e. reCAPTCHA. We notice that we need a Site key and a Secret key, which can be obtained by registering for CAPTCHA. To register, follow http://www.google.com/recaptcha/admin
- Once the page loads, we need to enter the information as follows. In the label field, enter any name. Any name would suffice.
- Next, we choose the type of reCAPTCHA that we are looking for. The one that we are using is reCAPTCHA v2.
After that, we enter the domain name(s) in the order of one name per line. Since we are locally hosted, we have written localhost.
- Check the reCAPTCHA terms of service and opt for alerts if you want to. Click on register and everything should be good to go.
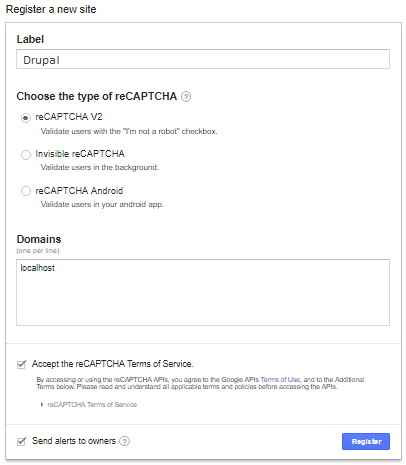
After registering, a new window with the Site key and the Secret key will be displayed. Copy the keys and paste it in the respective fields shown in fig 3.
Is the User Pulling The Hair Again?
Users didn't have a favorable experience with the first version of reCAPTCHA because a user had to figure out what was scribbled and at times, it can be really frustrating.
Such experiences are considered a barrier for users suffering from dyslexia, hypermetropia or people suffering from vision impairment. Although an audio aid was developed to tackle this issue, it wasn't of much help as the audio was extremely hard to decipher.
However, with the release of version 2, all of the above-mentioned shortcomings were solved and the verification process was reduced to a few clicks. This was all possible due to machine learning which was implemented to monitor the pointer behavior and the overall browser interaction which increments the CAPTCHA difficulty in case a bot is suspected.
From this, we can conclude that the user experience has definitely improved and fewer hairs are being pulled.
This is how we configure and set up the shield against spam bots. This is a very effective way to prevent spam attacks.
Subscribe
Related Blogs
Drupal's Role as an MCP Server: A Practical Guide for Developers

"The MCP provides a universal open standard that allows AI models to access real-world data sources securely without custom…
What’s New in Drupal CMS 2.0: A Complete Overview
"Drupal CMS 2.0 marks a significant change in the construction of Drupal websites, integrating visual site building, AI…
Drupal AI Ecosystem Part 6: ECA Module & Its Integration with AI

Modern Drupal sites demand automation, consistency, and predictable workflows. With Drupal’s ECA module, these capabilities…


