The internet is a global system which consists of private, public, academic interconnected computer networks that use the internet protocol suite namely TCP/IP to link devices worldwide. Powerful computers are used to contain all the necessary information which may be accessed by users from all over the world.
This architecture is known as the client-server model where clients are web browsers, chat applications, email applications etc that requests for information and servers provide for the required information.
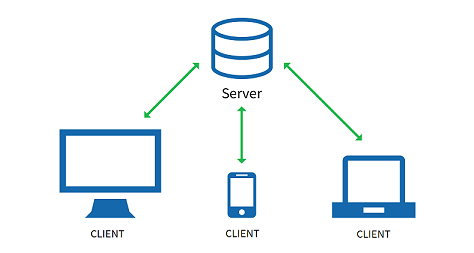
But for a server to function as desired, a software is necessary. This software that makes a server process client requests is known as server software. Although, there is various server software designed for different applications, in this article we are going to focus on web server software.
The Apache HTTP Server
The Apache HTTP Server is a web server software among an ocean of web server software. It is a free, open-source and cross-platform software released under the Apache license.
For a hassle-free installation on a Windows system, we will be using XAMPP which is a web server stack developed by Apache Friends.
For Linux and MacOS, LAMP and MAMP can be used respectively
Preparation for Installation of Drupal on an Apache Web Server
XAMPP is a free open source cross-platform web server solution stack package which can be downloaded from apachefriends.org from the downloads section. However, XAMPP should only be used for development purpose because it lacks the necessary security features.
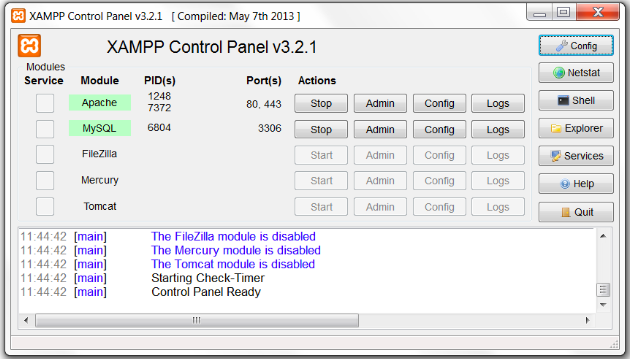
After installing XAMPP, we need to open XAMPP control panel and make sure that the Apache and MySQL Modules are up and running which can be made sure by going through the activity window at the bottom of the panel.
Next, we would need to extract the files from the Drupal archive to a new folder and place it in C:\xampp\htdocs. While naming the new folder, spaces should be avoided as this can cause problems while trying to access Drupal during installation.
Creation of database
Now, we need to build a database to store all the information for which the site has been created. A CMS works on the principle where the data is completely different from the forms which portrays the data to the user.
To create a database, we need to open the browser and type the following in the address bar;
localhost/phpmyadmin/
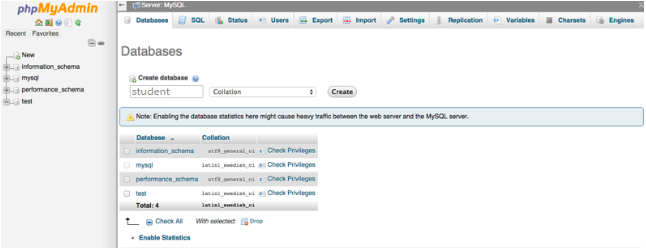
After that, click on Databases and type the name of the database and click on Create button.
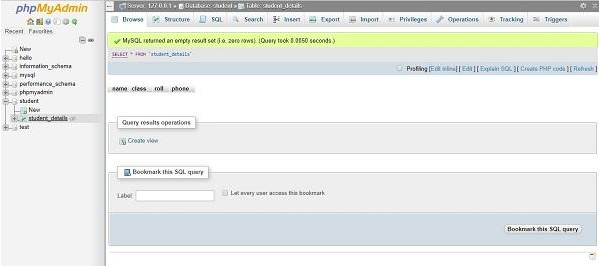
On the left tree view, the name of the newly created database will be displayed. To create a table, click on the name of the database in the tree view. In this case, we have named it as "student".
In the create table menu, specify the name of the table and the number of required columns and click go which will further open up the attributes window where the user can input the name of the columns, the type of data to be stored, etc.
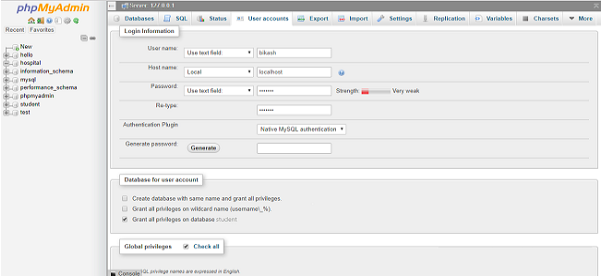
Now, we go to the privileges tab and click on Add user account which directs us to a window where we need to type in the login information of the user. The first field is the username. We can enter any name. In this case, we have used "bikash".
The next field is the hostname which is a drop-down menu. We select Local, as we are creating a localhost network and enter a password in the next field. There is also a provision for generating a complex password if one wishes to do so. Thereafter, we need to assign privileges to the user i.e., assigning power to manipulate databases and click on go.
The system will display a message of successful query execution if everything goes well.
Finally the main hero
After creating the database, we are ready for the installation of Drupal but before that we need to extract Drupal files into the htdocs folder located inside XAMPP directory. Now, we have to type in as follows in the browser address bar;
localhost/<name of the folder>
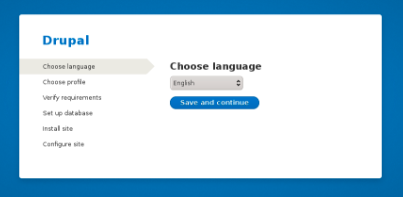
The name of the folder after localhost is connected to the folder in C:\xampp\htdocs where the Drupal files were extracted in the very beginning. After we hit enter, the browser should display a page where one needs to select the language. Drupal supports a wide range of language and after selection of the desired language, we click on save and continue.
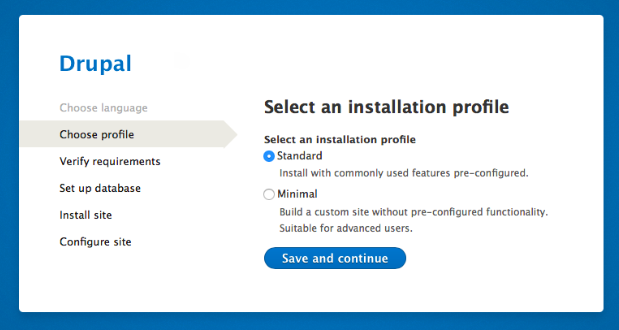
The next screen displays the types of installation available.
• Standard installation, where most commonly used features are pre-configured.
• Minimal installation, where features are not pre-configured and are only recommended for advanced users.
After choosing the installation type, the next step is verification of requirements. In this step, generally, no user intervention is required. However, if a user is not satisfied, one can click on retry at the bottom or click on continue anyway to proceed to the next step.
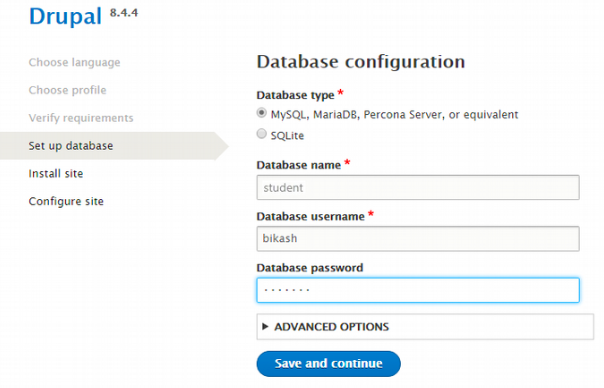
The next step is the set-up database step, we need to enter information relating to the database name, username and the password associated with it, after selecting the database type.
Upon clicking on save and continue, the following screen which shows a progress bar of the modules being installed will be displayed. All that we need to do now is wait for the installation to complete.
After the progress bar reaches 100% and all the necessary modules are installed, the final step is the configure site step.
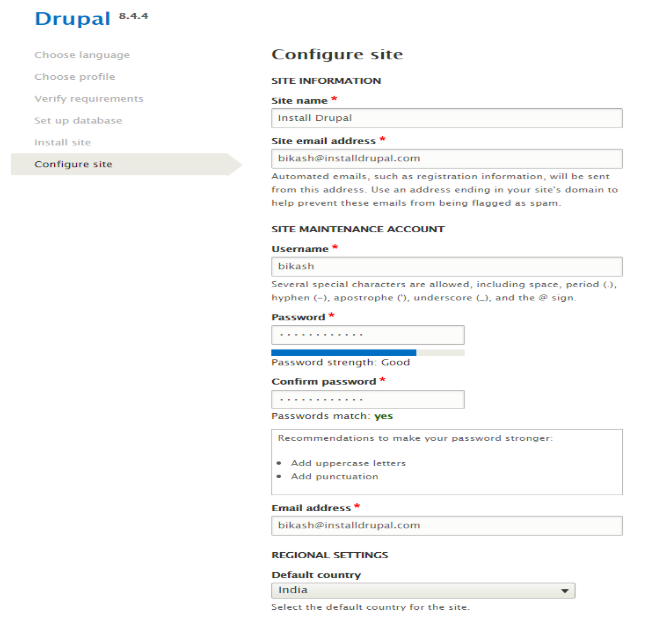
Here, we can configure our website. The first field is the insertion of site details and the site email address which relates to the email address that would be used when sending emails via the site.
The site maintenance account is the admin account or the person who is responsible for maintenance of the website. It requires a username, a password, and an email address.
After that, we need to add regional details such as country and time zone.
A user can opt for update notifications if he/she so wishes and click on save and continue.
If all the steps mentioned have been carried out without any discrepancy, the website should be up and run by now. This is how we can install Drupal on an Apache server.
Subscribe
Related Blogs
Back from DrupalCon Atlanta 2025: A Milestone Moment for OpenSense Labs

“Fit. Fast. Built to Last.” That wasn’t just a tagline, it was the mindset we brought to DrupalCon Atlanta 2025. And judging…
Back from DrupalCon Atlanta 2025: A Milestone Moment for OpenSense Labs

“Fit. Fast. Built to Last.” That wasn’t just a tagline, it was the mindset we brought to DrupalCon Atlanta 2025. And judging…
Explainable AI Tools: SHAP's power in AI

Do you know what are explainable AI tools? Explainable AI tools are programs that show how an AI makes its choices. They help…


