Block system has been one of the key improvements in Drupal 8. They are exportable, fieldable and reusable elements that can be placed inside regions of a page. All these functionalities are provided by the Block core module which is enabled by default.
Another interesting feature about the block system is the ability to show or hide these blocks depending upon the conditions provided by the Conditions Plugin of Drupal 8, such as content type, request path, user roles, etc. But with this feature, comes a couple of problems.
First, looking at the admin interface of the block layout, there is no way to distinguish or filter out blocks that will appear on a specific visibility condition. You need to go through the configuration of each block individually to figure out when and where they will be displayed.
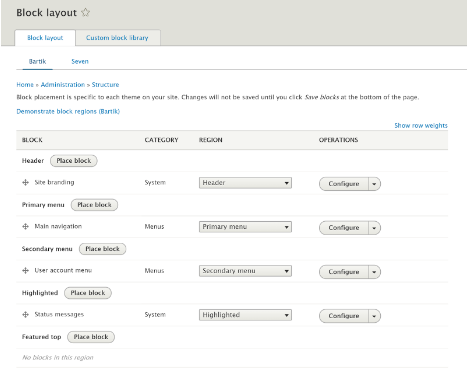
Second, it lacks the notion of the grouping of blocks depending upon their conditions. While the ability to apply conditions on individual blocks gives fine control, it also brings complexity in managing them per block.
This is one area where Drupal is open for improvement and a few modules including Block Visibility Groups, Context, and Panels try to address this issue. The first one provides the simplest and naive solution to the above-discussed problems, while Context and Panels offer more complex use cases. In this article, we will be looking at how the Block Visibility Groups module solves these issues, but first, let us see how to install it on our Drupal site.
How to download and install Block Visibility Groups?
The procedure is similar to installing any other module. There is only one dependency – the core Block module, which should be enabled by default on your site. You may install the module using any of the below methods:
Using Admin UI
- Navigate to Manage → Extend → Install new module and enter the .tar.gz or .zip URL of the module and hit "Install"
- Once the downloader and installer finished, click on "Enable newly added modules".
- Find the module in the list, select it and click on "Install". Additionally, you may also install its sub-module Block Visibility Groups Admin.

- If you wish to install the module through the terminal, first navigate to the root directory of your Drupal site and then use any of the following methods.
$ cd /var/www/html/drupal8
Using Composer
- Add the package using composer
$ composer require "drupal/block_visibility_groups"
- Enable the module by navigating to Manage → Extend, selecting it and clicking on "Install". Additionally, you may also install its sub-module.
Using Drush
$ drush dl block_visibility_groups

$ drush en block_visibility_groups block_visibility_groups_admin -y
Using Drupal Console
$ drupal module:download block_visibility_groups

$ drupal module:install block_visibility_groups block_visibility_groups_admin
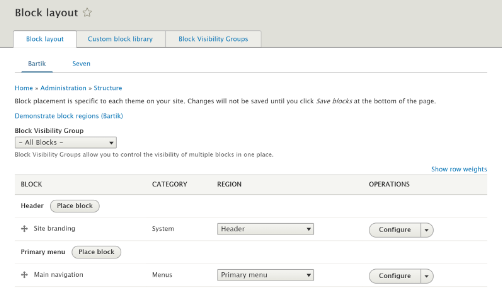
After installing the module, visit the same block layout page, and observe the new tab and filter drop-down added by the module.
Creating a Block Visibility Group
The module gives the ability to apply visibility conditions on a group of blocks, rather than the individual blocks. This makes managing them a whole lot easier. But first, we need to create a group.
- Navigate to Manage → Structure → Block layout and click on “Add Block Visibility Group button” on the Block Visibility Groups tab.

- Give an appropriate label. Check “Allow other Conditions on blocks” if you wish to retain the ability to add conditions on individual blocks. We can either perform a logical AND (all conditions must satisfy) or a logical OR for the conditions of this group (anyone condition may satisfy). Click on “Save” when done selecting the options.
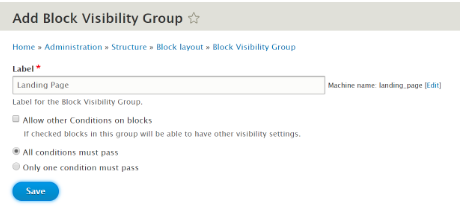
- You will be taken back to the list of groups. Click on “Edit” button against the group.
- Now, we can start adding conditions for this group. These are the core conditions that will be applied to all the blocks of this group. Let’s add “Request path” and “User Role” conditions. We will display different blocks for different user roles visiting a landing page. Enter the page path and click on “Add condition”. Similarly, add a User Role condition and select Anonymous users.
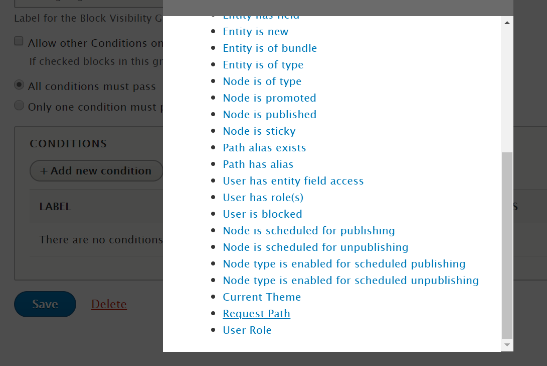
- Click on “Save” to save the block visibility configuration.
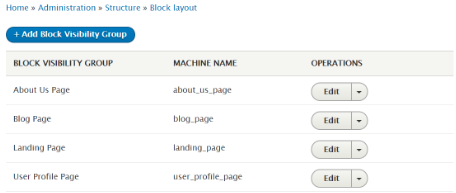
Adding blocks to the Visibility Groups
Now that we have created the required groups, we can start adding blocks to them. The conditions that we specified to the groups will be applicable to each of the blocks we add.
- Go to the same block layout page (Manage → Structure → Block layout)
- Either place a new block in any of the regions or click on the “Configure” button against any of the existing blocks.
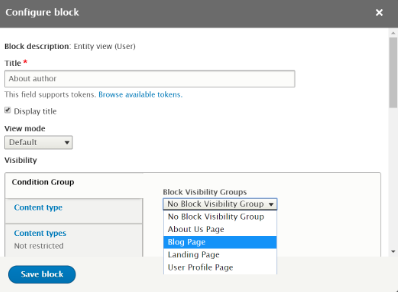
- Select the group from the list of created groups present under the Condition group vertical tab.
Similarly, add all the required blocks into groups.
Managing blocks in different Visibility Groups
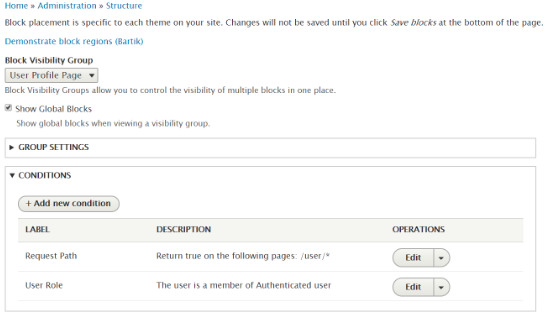
The module provides a drop-down filter on top of the standard block layout. This allows site builders to manage the blocks within different groups efficiently. It makes it easier to view all the blocks that reside in a group, with an option to show or hide the global blocks. Moreover, the conditions and group settings can also be managed right from the Block layout page.
After filtering out the blocks, you can arrange them just like the usual way using the drag and drop interface.
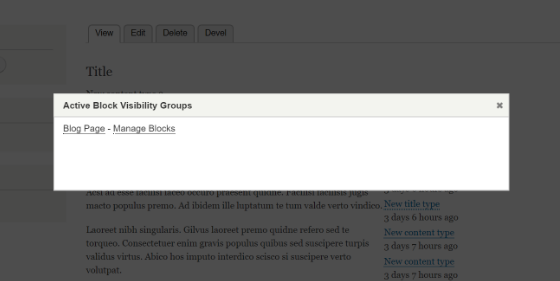
The submodule of this project places a helper menu in the admin toolbar. It will conveniently tell you the active groups on any given page, along with the direct links to the group settings and managing the blocks.

This makes it even simpler and convenient for the site builders to manage and test the visibility conditions for blocks.
Conclusion
The Block Visibility Groups integrates seamlessly with the existing Block system of Drupal and provides an intuitive way for site builders to manage blocks across pages with different visibility conditions. It offers a simple approach to handle the problem and is one of the must-have modules for sites with a large number of blocks.
Contact us at [email protected] to understand how can you leverage the benefits of this module for your Drupal website.
Subscribe
Related Blogs
Drupal's Role as an MCP Server: A Practical Guide for Developers

"The MCP provides a universal open standard that allows AI models to access real-world data sources securely without custom…
What’s New in Drupal CMS 2.0: A Complete Overview
"Drupal CMS 2.0 marks a significant change in the construction of Drupal websites, integrating visual site building, AI…
Drupal AI Ecosystem Part 6: ECA Module & Its Integration with AI

Modern Drupal sites demand automation, consistency, and predictable workflows. With Drupal’s ECA module, these capabilities…


