How many times have we bumped into a blogs’ landing page with the most recent or most popular highlighted with a different size dimension? Or take an example of an e-commerce website, some random promotional content between regular products, getting extra traction? Quite often, right?
In this blog, we will learn to modify the view row structure in the view template, in your Drupal 8 website to create that block for special content.
For static HTML pages, it is easy to add and modify the structure as per the needs and requirements. We can place any section anywhere. But considering a CMS like Drupal, it is not easy here. There is a defined structure of the templates and to customize according to the requirement, we need to modify the twig template.
Let’s take a general example of blog listing page with 2 cases and implement it step by step in Drupal 8 and implement this in Drupal view:
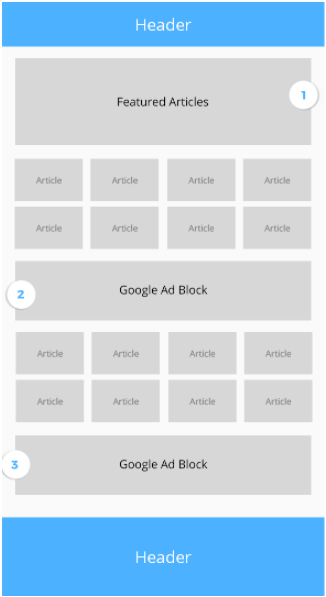
Case one: We need to place Google ad in between blog list view in random order.
Case two: First blog article should have a different style from other listed blog article.
The image below is the reference for the above cases.

Case 1: Adding Google Ad Between Blog List Page In Random Order
Summary: To implement this, we need to create the Google ad block and place it in views-view-unformatted.html.twig file accordingly. Here, I am adding step by step tutorials.
- Content type creation.
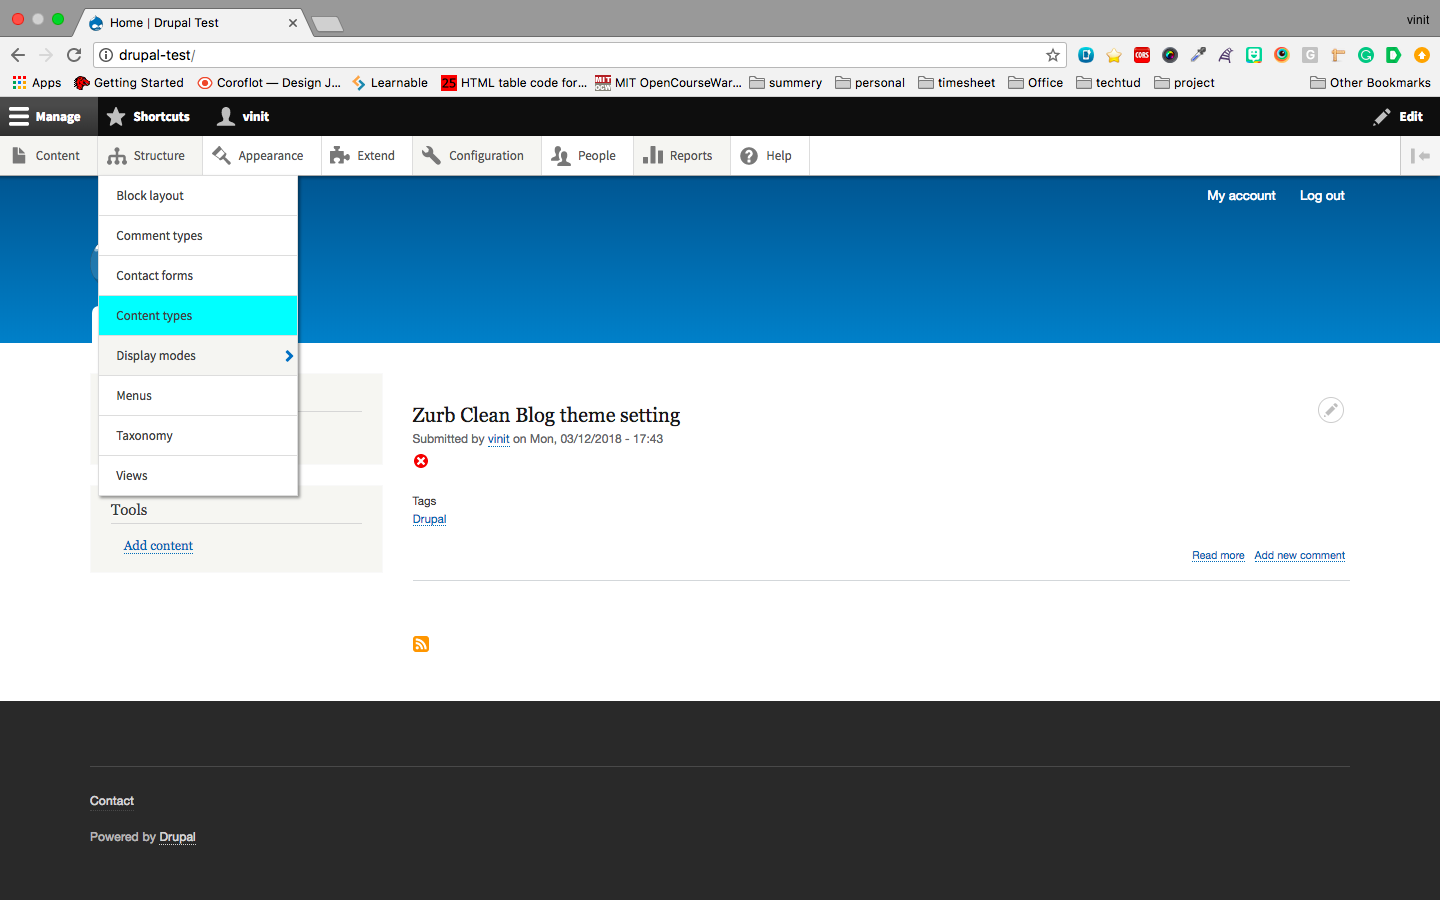
Create a content type and name it ‘blog’
Go to admin/structure/content type/add new content type.

Creating content type blog
Add multiple blog content.
- Now, create a view of blog content type.
Go to admin/structure/view/add new view.

Creating 'view' for blog listing - After creating a view, Override the twig template file view--unformatted.twig.html with views-view-unformatted--<view machine name>.html.twig
- Now, create a custom block with name google-ad with Google ad snippet in it.
- To place the ad block, we need to create the custom block variable in the .theme file so that we can place the block in the template file in views-view-unformatted--<view machine name>.html.twig.
- In <theme_name>.theme file add the following code
function <themename>_preprocess_views_view_unformatted(&$variables) {
   $block = \Drupal\block\Entity\Block::load('google-ad');
   $variables['google-ad-block'] = \Drupal::entityTypeManager()
   ->getViewBuilder('block')
   ->view($block);

}
We have created block variable {{ google-ad-block }} in .theme file which can be rendered in twig templates.
- Now, place the block variable {{ google-ad-block }} in views-view-unformatted--<view machine name>.html.twig template in random order. An example of the template is added below.
{#
/**
 * @file
 * Default theme implementation to display a view of unformatted rows.
 *
 * Available variables:
 * - title: The title of this group of rows. May be empty.
 * - rows: A list of the view's row items.
 *   - attributes: The row's HTML attributes.
 *   - content: The row's content.
 * - view: The view object.
 * - default_row_class: A flag indicating whether default classes should be
 *   used on rows.
 *
 * @see template_preprocess_views_view_unformatted()
 *
 * @ingroup themeable
 */
#}
{% if title %}
  <h3>{{ title }}</h3>
{% endif %}
{% for row in rows %}
{%
set row_classes = [
  default_row_class ? 'views-row',]
cycle(['grid', ' small-12 medium-12 custom-full-grid'], (loop.index == 1) ),
%}

    {% if loop.index == 1 %}
    <div{{ row.attributes.addClass(row_classes) }}>
      <div>
        {{ row.content }}
        </div>
    </div>
    {% endif %}
    {% if (loop.index == 2) or (loop.index == 3) or (loop.index == 4) %}
    <div{{ row.attributes.addClass(row_classes) }}>
        {{ row.content }}
    </div>
    {% endif %}
    {% if loop.index == 5 %}
    <div{{ row.attributes.addClass(row_classes) }}>
    {{ row.content }}
  </div>
        <div class="small-12 columns bottom-40 show-for-medium">{{ google-ad-block }} </div>
    {% endif %}
    {% if loop.index == 6 or loop.index == 7 or loop.index == 8 or loop.index == 9 or loop.index == 10  %}
    <div{{ row.attributes.addClass(row_classes) }}>
        {{ row.content }}
    </div>
    {% endif %}
    {% if loop.index == 11 %}
    <div{{ row.attributes.addClass(row_classes) }}>
        {{ row.content }}
    </div>
        <div class="small-12 columns bottom-40 show-for-medium">{{ google-ad-block }} </div>
    {% endif %}
    {% if loop.index == 12 or loop.index == 13 or loop.index == 14 or loop.index == 15 or loop.index == 16  %}
    <div{{ row.attributes.addClass(row_classes) }}>
        {{ row.content }}
    </div>
    {% endif %}
    {% if loop.index == 17 %}
    <div{{ row.attributes.addClass(row_classes) }}>
        {{ row.content }}
    </div>
        <div class="small-12 columns bottom-40 show-for-medium">{{ google-ad-block }} </div>
    {% endif %}
    {% if loop.index == 18 or loop.index == 19 or loop.index == 20 or loop.index == 21 %}
    <div{{ row.attributes.addClass(row_classes) }}>
        {{ row.content }}
    </div>
    {% endif %}

{% endfor %}
And it is done!
Case 2: Styling The First Blog In List Page Differently
In this case, We need to add one class specific to the first featured blog on the list. So that, we can add CSS specific to this. Add the below code in views-view-unformatted--<view machine name>.html.twig file already added in above example template code.
set row_classes = [
  default_row_class ? 'views-row',
  cycle(['grid', ' small-12 medium-12 custom-full-grid'], (loop.index == 1) ),
]
Here, we have added one custom class custom-full-grid to the first child list. Now we can style this block accordingly.
When it comes to catching the attention of your user, various media elements do it better. In fact, more varied the types of media, easier it is for you. Convenient if the content manager wants to embed and promote video content or any particular blog or image sans any extra tool. Custom theming of view template to modify view rows structure in your website is one of the easy ways to adjust and create space for the content managers to take control.
Like the article? Comment below to let me know what you feel about the article.
Subscribe
Related Blogs
Drupal's Role as an MCP Server: A Practical Guide for Developers

"The MCP provides a universal open standard that allows AI models to access real-world data sources securely without custom…
What’s New in Drupal CMS 2.0: A Complete Overview

"Drupal CMS 2.0 marks a significant change in the construction of Drupal websites, integrating visual site building, AI…
Drupal AI Ecosystem Part 6: ECA Module & Its Integration with AI

Modern Drupal sites demand automation, consistency, and predictable workflows. With Drupal’s ECA module, these capabilities…


