Strong online presence not only attracts potential clients, and gives a good impression of your organization, it can also help beat your competition through the right combination of visually appealing themes and content.
jQuery Masonry is termed as a revolutionary grid layout plugin which helps move elements vertically minimizing the gap of vertical heights, unlike CSS floats which help elements move left to right. It works by placing elements in optimal position based on available vertical space, sort of like a mason fitting stones in a wall. The Masonry or the grid style website template can give your website an extra "oomph" factor that sets your website apart. It makes the websites look clean and organized, at par with the regular websites on the web.
Flow2 is a sub-theme based on Bootstrap which, when used with Masonry Grid Layout can do wonders in terms of presentation. It positions each element in the next open spot in the grid, which minimizes vertical gaps between elements of varying height.
In this tutorial, we will be creating a Masonry Grid landing page with Flow 2 in Drupal 8.
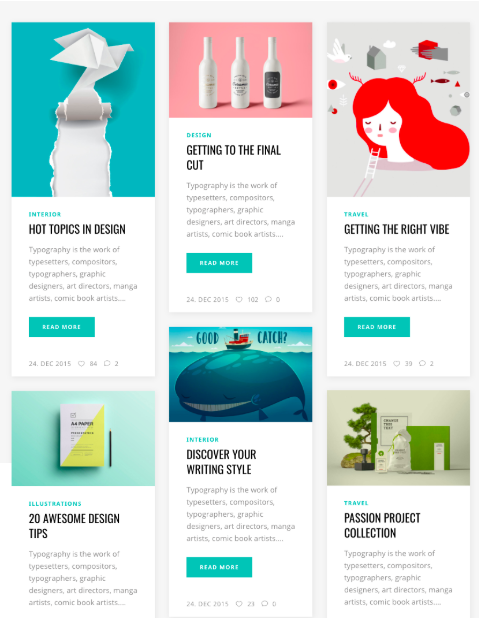
TL;DR
Create a Flow 2 sub-theme using Bootstrap as its base theme with some related modules to give a masonry grid layout, by -
Step 1: Theme installation
Step 2: Dependent Module Installation
Step 3: Site configuration
Develop Masonry theme layout
- Step 1: Install the Theme
- To install the Flow 2 theme, first, install the required Bootstrap theme as the base.
- Download and install the Flow theme from Drupal.org and set it as default.
- Create dummy articles to check the output result. For now, the output will be the Drupal default with Flow 2 theme style. Default output after activating the Flow2 theme will be:
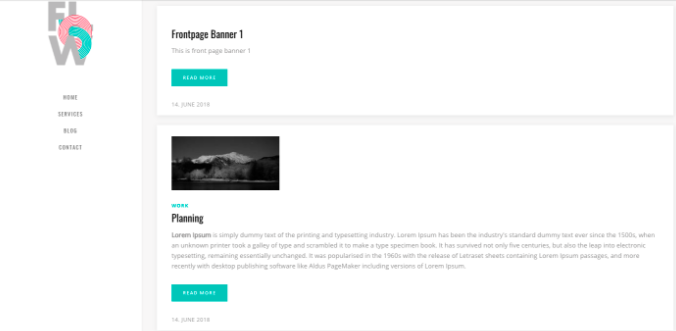
Default output after activating Flow 2 theme
- To install the Flow 2 theme, first, install the required Bootstrap theme as the base.
- Step 2: Installing the Required Module
- To achieve the Masonry Grid Layout, you would need the following additional modules.
Masonry API
Masonry Views
These two modules will work with the Libraries module.
- Install the module with Composer with the following steps:
- Open your terminal or CMD or run the following command 'drupal/masonry_views:^1.0'
This will download all your dependent module in /module folder.
- Open your terminal or CMD or run the following command 'drupal/masonry_views:^1.0'
- Download the Masonry plugin
v2 with branch 2.x. Rename the file to be located at: /libraries/masonry/jquery.masonry.min.js
v3 with branch 3.x. Rename the file to be located at: /libraries/masonry/masonry.pkgd.min.js
- Create a directory for images (in the library's directory) and download the imagesloaded library.
- Rename it to be located at: /libraries/imagesloaded/imagesloaded.pkgd.min.js
- Download and enable Masonry API (and optionally Masonry Views)
- Check /admin/reports/status to ensure the Masonry plugin was detected.
- Just click v2, v3, imagesloaded.pkgd.min.js.
- Save and move. Create one folder in root where site and module folders are located.
- Folder name libraries > Masonry or imagesloaded > Paste your file masonry > v2, v3, and imagesloaded > imagesloaded.pkgd.min.js
- Create a directory for images (in the library's directory) and download the imagesloaded library.
- To achieve the Masonry Grid Layout, you would need the following additional modules.
- Step 3: Configuring the Theme
- Add multiple articles in Drupal
- View Configuration. Go to View and edit frontpage
- Format | Style
Open format > choose Masonry style form the mentioned list.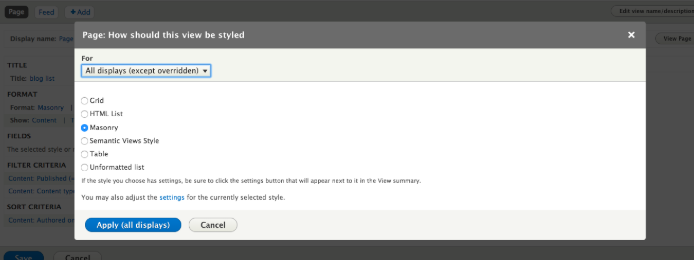
- Format | Setting
In style setting, we have the option to add row class.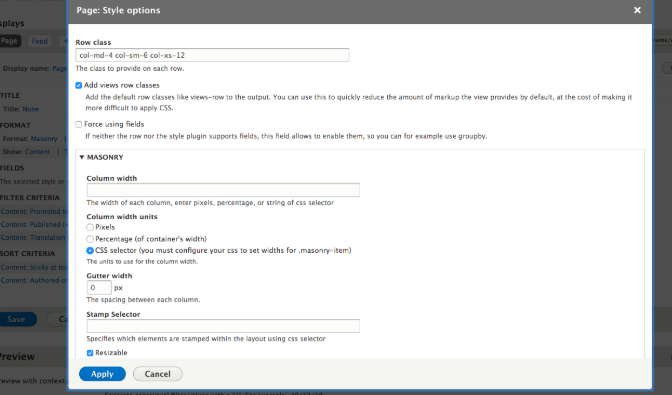
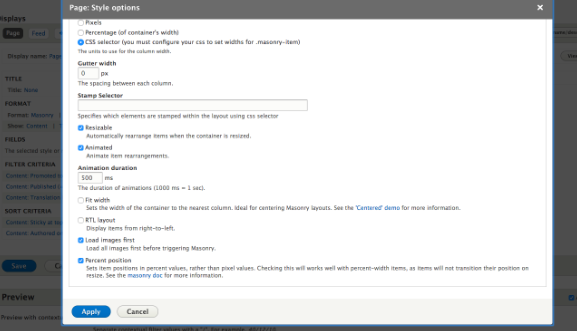 In style system
- Format | Style
- Add multiple articles in Drupal
Final Responsive Output
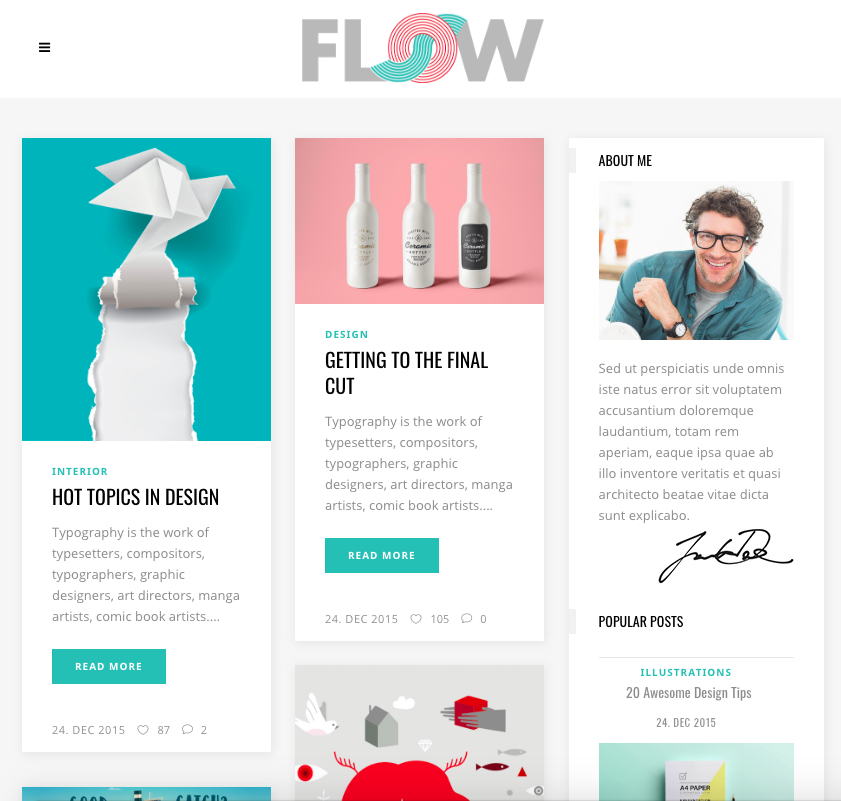
And it is done!
Drupal Flow 2 module is developed and supported by OpenSense Labs. The project is not covered by security advisory policy use it at your own risk.
Subscribe
Related Blogs
Inside the Drupal AI Summit: Themes, Speaker and What To Expect

“ The web is changing fast, and AI is rewriting the rules. It writes content, builds pages, and answers questions directly,…
FOST and Drupal AI Initiative: Next Era of Responsible AI

Three years after the launch of generative AI tools marked a new age for artificial intelligence, almost 90% of survey…
Drupal AI Ecosystem Part 5: AI Content Suggestions

Drupal has steadily evolved from being just a content management system into a flexible platform that incorporates emerging…


