
In 5 Easy Steps Create & Manage Newsletter in Your Drupal 8 site

Sourav
Drupal
Published on 25 May, 2018
5 min read
Newsletters are an important marketing tool and a cost-effective way to engage the clients and current base while attracting and building a new customer base, simultaneously.
In this tutorial, we will learn to create and manage newsletter functionality for your Drupal website using Simplenews.
What is Simplenews?
Simplenews is a popular Drupal module used for creating, sending, and publishing newsletters to the subscribers' list. With this module, both anonymous and authenticated users can opt-in to different mailing lists.
The module is currently available for Drupal 7 and 8.x-1.0-alpha3 (as of 25 May 2018) and a total of 63,878 sites are currently using it.
Let’s start with the step-by-step guide on how you can manage newsletter in your Drupal website.
Module Installation
To integrate your Newsletter, you need to install Simplenews module from Drupal.org. You can use composer to install the module. Run the command given below to start with:
'drupal/simplenews:^1.0'
Once you have installed the module go to Extend → Enable.
Step I – Configuring the default settings
To start with let's configure the default settings first. Go to
Configuration → Web Services → Simplenews → Newsletter → Settings. 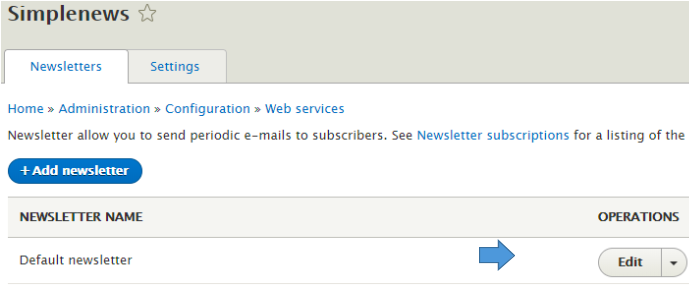
-
When in the Newsletter tab
- Once there select the Newsletter tab → Default newsletter option → Format
- Select your Format
- Plain – Can be used as the default newsletter format. The newsletter will be sent as plain text.
- HTML – You need to install Mime Mail module or HTML Mail module to send newsletters in HTML format.
Emails will be sent coded with HTML. It allows different HTML tags like, <a>, <pre>, <div> etc. also other HTML codes.
- Plain – Can be used as the default newsletter format. The newsletter will be sent as plain text.
- Request a read receipt to know the success rate
Request a read Receipt from your newsletters. A lot of email programs ignore these so it is not a definitive indication of how many people have read your newsletter.
These options will be the default for new newsletters but can be overridden in the newsletter editing form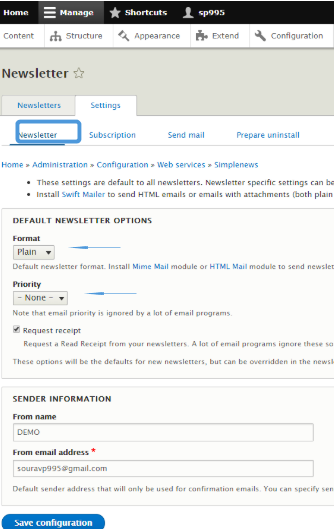
- Select your Format
- Enter the information and click Save
Enter the relevant information of both the sender and receiver. Default sender address that will only be used for confirmation emails.
- Once there select the Newsletter tab → Default newsletter option → Format
- When in the Subscription tab
Configure for the subscription and unsubscribe emails option according to your need.
- Add the confirmation email
Here you have two choices. One is for the user to subscribe/unsubscribe the single newsletter, the other when a user subscribes/unsubscribes from multiple newsletters at once (Combined Confirmation Mails).
Fill in the details for the confirmation mail in both the single and combined confirmation emails.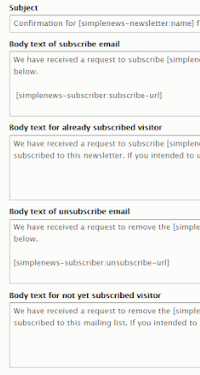
- Select the information for the confirmation pages
Provide Drupal path or the URL of the destination page where the user will be redirected to after the subscription confirmation.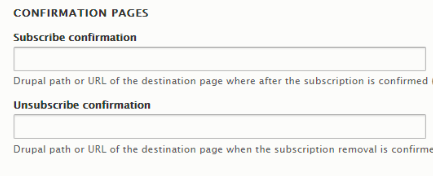
When unsubscribing, the user should be redirected to a confirmation. Add the Drupal path or URL of the destination page where after the unsubscription is confirmed.
- Add the confirmation email
- In the Send mail tab
In this section, we will learn to use cron to send a newsletter, and how useful can cron turn out to be.
- Using cron to send newsletters
Cron is recommended to send newsletters. Just select cron to use it to send newsletters. You can use Cron throttle to set the numbers of newsletters sent per cron run. However, even the failure will also be counted.
Make sure your cron execution time must not exceed your PHP maximum execution time.
- Set your mail spool expiration
This will spool newsletter emails. You have four options (Immediate/1 day/ 1 week/ 2 weeks) and if corn is not used to send messages in this period, it is recommended for immediate expiration.
- Track your log emails
This provides functionality indicates when a message is sent to the PHP mail() function.
- Using cron to send newsletters
Step II – Configuring the default Newsletter category
Here, we will configure the newsletter category. Click on Edit in Default newsletter operation and modify the fields.
Name: Simplenews newsletter
Description: Give a suitable description for your newsletter
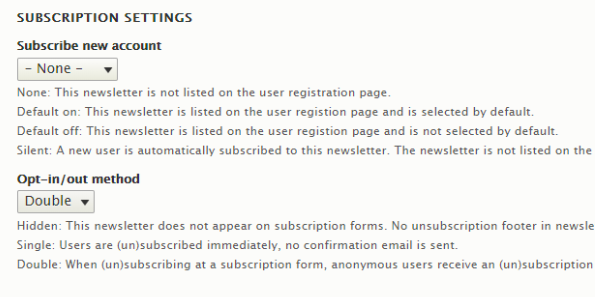
- Select your subscription settings
It is important to keep in mind that when a new user subscribes s/he gets the best interface. When you are in the subscription settings, you would find four options in the drop-down list – None/ Default on/ Default off/ Silent – select according to your preference.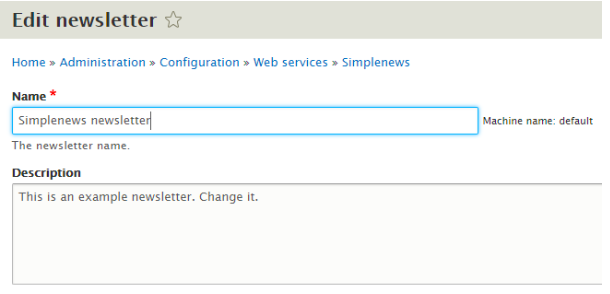
Step III – Creating the first Newsletter
- Go to Content → Simplenews newsletter → Set the Title → Enter the body → Save

Cheers!! We have successfully created our First Newsletter.
Step IV – Test your Newsletter
Test your first newsletter before rolling out. When you view the newsletter you can see the options of 'edit' and 'newsletter'.

Add your test email address, in case of more than one recipient, use a comma to separate each address and click on Send Now.
Step V – Creating the subscription block
After your successful testing, you need to create the subscription block so more and more people can subscribe to your list. To add the subscription block:
- Go to Structure → Block Layout → Choose a region for the subscription block where you would want to add that block and click on Place block.
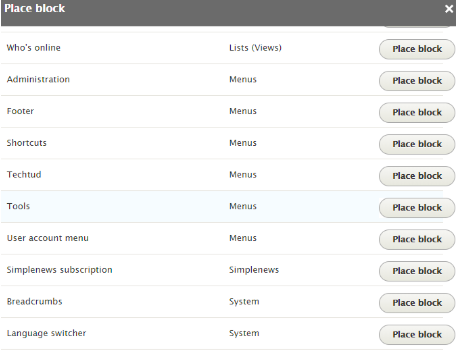
- A pop up will appear on your screen with a list of blocks. Choose the block labeled as Simplenews subscription and click on Place block.
- Another pop up named Configure block will appear. With it, you can change a title, block message, and add the Unique Id (each subscription block must have a unique form ID).
If no value is provided, a random ID will be generated. Specify the roles and pages. Click on Save block.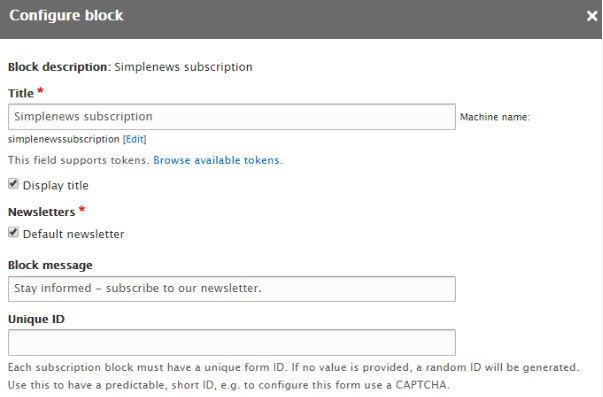
-
Scroll down and click on Save block again. Now, go back to the main page, you will find a block from where one can subscribe just by clicking on Subscribe button.

In 5 easy steps, you can now create and manage your own newsletter. Happy Marketing :)
Let me know in the comments below how you find the guide.
Subscribe
Related Blogs
Drupal Debug: Effective Techniques And Tools
Today, we will discuss how to do Drupal Debug. This means getting the tools and methods to turn complex issues into workable…
Drupal SDC v/s Storybook: What’s The Difference?

One helps you set up your UI components, and the other allows you to work with them. we are exploring Single Directory…
Starshot: Drupal’s New CMS Initiative
The Drupal community is excited about the Drupal Starshot project, which aims to update and improve the Drupal experience…